//Google Analytics

Tuesday, July 30, 2013

DIY: Chalkboard Paint Labels


In the past 6-8 months I've really been trying to store things in glass jars rather than plastic that can leech chemicals into the contents. It started because I want to make healthy decisions for my husband and I but also because I couldn't handle throwing away perfectly good glass jars anymore! 
Growing up, we had a local dump that we'd take all our trash and recycling to. My dad had a great system of composting, recycling, and burning so that the amount of trash going into the dumpster was at a minimum. 

All food scraps went into the compost bin. Plastic, paper, glass, and cans went into recycling. Any kind of personal info like mail and documents went into the burn barrel. 
Then I got married and moved from home to a place that doesn't offer recycling! I think I get a little twitch in my eye every time I have to put a cardboard box into the trash can. 
But as far as glass jars go, I save almost all of them and put them to good use. Mostly I repurpose them into storage for bulk items but I also fill them with different things to give as gifts.

After a while I was getting weary of not being 100% sure what I was grabbing. You know, the whole baking powder vs. baking soda fiasco waiting to happen. Fortunately I never had any mishaps but I was waiting for it! 

Thanks to a Michael's gift card I received from a lovely and thoughtful friend for my birthday, I finally got chalkboard paint to ease my mind in the kitchen! 

Not to mention this project is super easy!

All you need is:

  • Chalkboard paint (I found my Martha Stewart brand at Michael's for about $7)
  • Foam brush
  • Chalk
  • Naked jars


Instructions:

Are you ready for how simple this is?


Shake up the bottle and squirt some paint onto a paper plate then dip your foam brush into the paint. Make sure you get an even coat on the brush. Now simply brush across the jar where you want the label to be.


As you can see, one coat doesn't cover it completely. Let it dry completely and then do another coat.


Paint the rest of your 45,356 jars.


Here you can see the difference between one coat (left) and two coats (right). 


Two coats (and sometimes three) get the job done. Let it dry for 24 hours.


Once they're dry, scratch chalk across the paint to "season" it.


Cover completely then just wipe away with a dry cloth. 


Now just write the name of the contents of the jars and you're good to go! Excuse my handwriting. It's not good to begin with but writing with chalk makes it worse!


I love seeing this in my cabinets now!


Always good to know the difference between baking powder and baking soda!


I absolutely love this project! It's so easy and inexpensive! I've heard of other ideas like painting printer labels but for an item that will be washed and reused, I thought painting right onto the jar would make more sense. And if I ever empty a jar and need to fill it with something new, it's as easy as writing on the jar!

The only downfall is that I have to be careful to not wipe off the chalk but it's really not that big of a deal. First world problems anyone? It's totally worth it to have a cute and organized kitchen!

How do you label your kitchen and your life? What have you used chalkboard paint for?

Till next time,
Catherine


I've linked up with Life After Laundry & Sensational Creations with their Less Laundry, More Linking party! Go check them out and spread some blog love! 

Monday, July 29, 2013

Weekend and Winning

All last week Brian was gone at Studentz Camp for work and this was the first year I was unable to go! This year it was held in Harrisonburg, Virginia at James Madison University, so almost 2 hours away from us, instead of at Liberty University in Lynchburg. It was sad to not be able to work camp but also very quiet and boring at home alone. He came home very tired but he had lots of awesome stories to share.

As soon as he came home, we got back into the car and drove out to Richmond to visit our families. It was a blast, as usual, but also exhausting, as usual.

Friday evening was spent with my family, gardening and playing with my 2 year old niece. Check out all the green veggies we harvested!


We got all of this on Friday evening. I even strapped on a headlamp to finish getting all those green beans because it got dark too quick!


The watermelon had some claw marks...we're guessing from a squirrel. Otherwise it was fine! Very heavy and perfectly shaped!


What a good harvest!

But that's not all!


Saturday morning we got back out to the garden because we knew we didn't get everything. It must be the Year of the Cucumber because we are up to our eyeballs in cukes! Yet tomatoes aren't ripening and when they do, they either rot or get eaten. Anyone else having these issues?


Those are some huge cucumbers! We're trying to give them away to friends and neighbors but everyone seems to have cucumbers out the wazoo!

I also helped out in my in-laws' garden on Saturday evening but I didn't get any pictures. My mother-in-law had just picked all the goodies before we arrived. Although we did get plenty of cherry tomatoes, cucumbers, and regular tomatoes.

All in all, a fantastic weekend of gardening, catching up with friends, and spending quality time with family. The way it should be!

Oh right...you're probably wondering where the "winning" part of the post title comes in. Well I entered a contest to win one pound of red wiggler worms for my worm farm and I won!!! I never win anything! The contest was put on by Swan's Organics. They're a company out in California that has all things gardening and composting! I'm excited to get my new worms and put them in with their new little family. "Little" may be the wrong word as they double their population every 3 months. I started with 500 worms in April and it's now almost August. You do the math! Because I suck at math, that's why.

What's your garden producing this week? How was your weekend?

Till next time,
Catherine

Wednesday, July 24, 2013

DIY: State Paper Art

I came up with this project from combining a few simple ideas. Lately there has been this wave of popularity for your home state themed items. Frequently in art but also in jewelry and other mediums. If you don't believe me, here are some examples. All of which I can't help but love!

(via)

(via)

(via)

(via)

(via)

This last picture is from Young House Love, my new favorite blog! They did a great segment on a local Richmond TV station where they gave several examples of quick and easy last minute Christmas gifts. The two picture frames on the table are state cutouts in pretty scrapbook paper on a solid background. Don't you just love their expressions?

My husband was born in San Diego, California but only lived there for a few years before his parents decided to move back to Virginia. I have lived here my entire life. As far as we're concerned, this is home! We absolutely love living here.  We have a desire to travel the world but Virginia will always be home. So I knew a tribute to Virginia would be a lovely addition to our home.

So for this project I combined the last two ideas and made my own state tribute. I simply Googled a map of Virginia but picked one that had counties outlined so I could pinpoint the area we both lived before moving to Lynchburg. The map I used is here

If you want to do this project for your home state and county, do it! It's really fun and easy and I absolutely love mine! 

You'll need:
  • Two pieces of scrapbook paper, your choice
  • Xacto knife or tiny precision scissors
  • Glue and/or tape 
  • Rotary mat (if you're using an Xacto knife)
Directions: 

Find a good map of your state. Print it to whatever size you prefer. I just stuck with 8x10 so I could easily print it with regular printer paper. 

Glue the corners your map onto your scrapbook paper. I used a few dabs of hot glue. You could use tape or a simple glue stick. Just don't glue the actual map area onto the scrapbook paper.


If you're using an Xacto knife, lay your rotary mat on a flat surface and place your paper on top. Carefully trace the outlines of the state. This part takes some time. Don't rush because you'll either hurt yourself or mess up and we don't want either of those things to happen!


If you want to cut out a heart, pick your favorite county or city and trace a heart over it and cut it out as well. 


Now just center your state onto the other piece of scrapbook paper and glue it down. I used rubber cement for this...not totally sure why I chose rubber cement over another type of glue. I doubt it makes much of a difference.


Now trim the excess of your scrapbook paper (they normally come in 12"x12" size) and slip it into your frame! 


Mine is living in our guest room above the hermit crab cage. 


The door across the hall goes to our bedroom. It was hard to get a good picture because of the shadows the light was casting. But, you get the idea. 

There you have a beautiful tribute to your home state. These would really be fantastic gifts! People are generally pretty loyal to their home state and county/city. I'll definitely keep this in mind as future gifts for friends and family!

Have you been spellbound by the state art that's been circulating lately? What's your home state and county/city?

Till next time,
Catherine

Check out some of the places I've linked up this post! The bloggers who host these parties are fantastic so go send them some blog love too!

I linked up with Life After Laundry and Sensational Creations for their Less Laundry, More Linking Party #2


Tuesday, July 23, 2013

Cardboard Helmet Tutorial Update - Reader's Photos!

Some of you may remember way back in the early days of my blog (a whopping 9 months ago!) that my husband "guest posted" on my blog with a tutorial on how to make a cardboard helmet. We had no idea what a response we would get from that post. I figured it would just sit and not get any views, especially since I see the "blogisphere" to be more of a lady's domain. I was so dead wrong!

Day after day, week after week, month after month, my husband's tutorial consistently stays at the top as the most viewed post! I kid you not! As of right now it is my most viewed post at a staggering 3700 pageviews! That blows my mind! Even my pallet garden tutorial, which I thought would exceed the helmet tutorial, only has a measly 1621 pageviews.

Needless to say, I continue to bug Brian to do more cardboard craft tutorials. There is a huge demand for it apparently! Brian makes them for fun and for the movies that he makes on the side. Evidently there are plenty of others out there who want to make them too!


Several people have left comments saying that they made a helmet but one lovely reader named Deb sent me a picture of the one she made! I think it looks fantastic! Her church was doing Kingdom Rock themed VBS and she was playing a knight. 

We absolutely love reading comments from this tutorial and I was giddy like a little kid to get a photo! It is really cool to see someone else's version of something on my blog. Thanks Deb for sending us a photo! We love it!

If you've made a helmet from Brian's tutorial (or any other post be it craft, DIY or recipe), we would love to see it! We'll only post it with your permission but we think the world should see your fantastic work as well! Send any photos to CatherinePageWood@gmail.com

In the meantime, I'll be bugging Brian even more to write up another tutorial!

Have you made anything from one of the posts here at Happily Ever Crafter? What was it? How did it turn out?

Till next time,
Catherine

Tuesday, July 2, 2013

How to Choose Blinds for Your Home {Guest Post}

Today I'm happy to bring you another guest post! This time, it is Danielle from the Melbourne Blind Company giving us some tips for choosing blinds for our homes! Take it away, Danielle!


Things to consider when choosing new blinds for your home

Maybe you’re sick of your current décor, or you don’t want to repair those old broken ones, buying new blinds can be surprisingly affordable. When you have decided that you prefer blinds to furnish your windows over the more traditional option of curtains, the first thing you will need to ask yourself is, what kind? What would you like your blinds to do; Keep eyes out? Keep light out? Provide privacy? Add colour? Filter light? Create ambiance?

There are a variety of blinds available, and they can be custom designed to suit the style and decor of your home, like those at the Melbourne Blind Company. From translucent roller blinds to romans and timber venetians, there are many to choose from. Blinds are considered a less formal style of window furnishings and are commonly seen in family areas, particularly to block out the sun which provides protection from UV rays by day and the added comfort of insulation at night. 

If you have a really large window space to cover, any kind of vertical blind, including panel blinds, are the best option as they allow for a long stretch of coverage. These come in both light and heavier options, but when the months are getting colder, insulation is what you need. You can layer blinds behind curtains, or purchase blinds that use thicker fabric.


You should look at the materials and the environment in which they will be used. Consider what will work best in wet areas such as bathrooms and laundries where dampness can be a problem if you don't have good ventilation. For the bedroom and living room, think about comfort and which blinds will not only look good, but also provide decent ventilation.

Also, be open to different types of blinds for different rooms. There is no reason for only having Verticals or Romans in every room of the home. Mix and match the style to suit the atmosphere of each room and for bedrooms, the taste of the person who lives in that room. Blinds are a really versatile way to furnish the windows in your home and instantly create a new, vibrant feel.


Thanks so much Danielle for your awesome post! My home is way overdue for some sprucing up with easy additions like blinds and curtains! 

Do you have blinds, curtains, or both in your house? What is your favorite style of blinds? 

Till next time,
Catherine

Monday, July 1, 2013

Spontaneous Weekend Visits

Can you believe it's July 1st? How in the world did June slip by so fast? 

That's ok...bring on the fall weather!!

This past weekend my mother-in-law and brother-in-law decided to come down for a spontaneous trip! We love having friends and family visit so we were super excited that they decided to come over!

(via)

When we got official word they were on their way and after a trip to the grocery store, my husband and I went into a cleaning frenzy. He helped, though, really. Now I don't see this as a fault and I know my in-laws and friends won't think less of me if the house isn't spotless (who has time to keep a house 'spotless'?), but when people come over, it is a perfect excuse to clean the house in record time! Works like a charm. I'm a pretty organized and clean person, but the house always looks great seconds before guests arrive! 

They arrived late Friday evening and so we mostly talked and played games. I had to work Saturday morning so everyone else stayed up and hung out when I went to bed early like the old lady I am. Saturday afternoon we all went down to the Farmer's Market to sample and buy local, delicious goodies. We bought eggs and potatoes for a super late breakfast and even bought the most delicious goat cheese from Spring Mill Farm. Sun dried tomato goat cheese is my guilty pleasure...it is to die for!


After the Market and a delicious homemade breakfast (at 2pm?!) we relaxed for a bit but then decided we should go out and enjoy the day. The hot, hot day. We drove down to Peaks View Park and walked the trails and got some sun. It was really nice, but quite hot. We were ready for some AC after a few miles!


Even Kito got to come along! He had a blast!

Don't tell but we even stopped by DQ on the way back for smore's blizzards! 


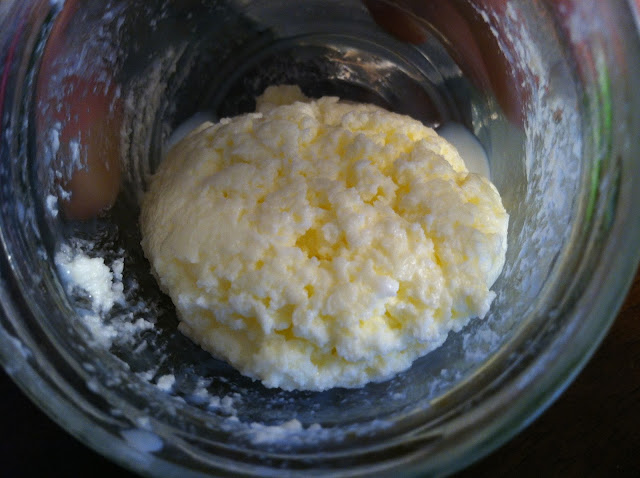
Sunday we made poppyseed chicken (delicious...recipe post in the works!) and butter! Yes, we made our own butter! It's incredibly easy but I won't give it all away now. I'll try and have that in a post for you all this week! 

All in all in was a wonderful weekend. Can't wait to have them out again!

And to top it off, now that it's July...it's officially my birthday month! This is the first birthday in about 5 years now that the camp we always work isn't happening during my birthday! Not that we don't love working camp, but I'm so excited to actually get to celebrate my birthday this year! It's also my "quarter of a century" birthday as my husband likes to remind me, so we're thinking an awesome celebration is in order! I can hardly wait!

How was your weekend? Do anything fun or productive? What are some awesome birthday ideas? I'm up for cliche´ or unique ideas! 

Till next time,
Catherine