//Google Analytics

Thursday, May 30, 2013

DIY-How to Shorten Window Blinds

How to Shorten Window Blinds 

or

How to Make It Look Like Your Potential Adopted Dog Didn't Destroy the Bottom of Your Blinds

Uhm...yea, about that. 

Long story short, we did a "home trial" with a dog we wanted to adopt. It didn't work out but it's in the best interest of us and more importantly, the dog. Maybe I'll write about him tomorrow. Anyone want a super sweet dog? 


I knew it was possible to shorten blinds but I didn't know how or how extremely easy it is! Here's a step by step tutorial which applies to just about all horizontal blinds. 


Assess the damage. Err...I mean...drop the blinds to their full length to see how much it needs to be shortened. 


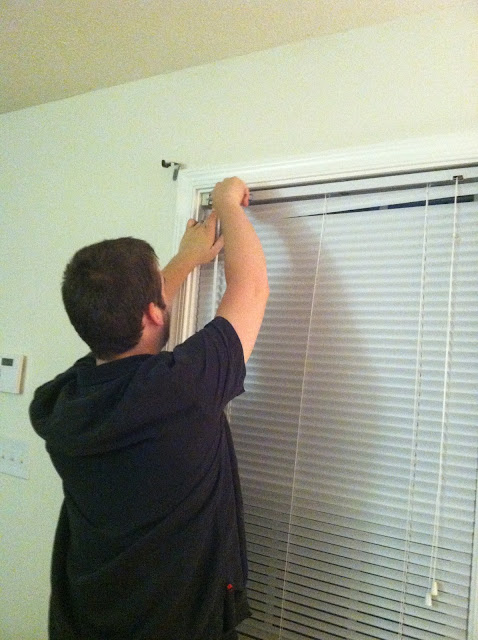
My wonderful husband (and his long arms) took care of trading the blinds. Fortunately, the blinds downstairs in the living room (that got ripped) are the same length and width as the guest bedroom. The living room windows are also much longer than the guest bedroom window so it worked out so perfectly.


Here are the broken blinds on the shorter window. The bottom in tact rung is just above the windowsill...perfect!


Remove the plugs from the bottom bar of the blinds. With nicer blinds it's easier to remove it but we had to use pliers. There will be one on each side. 


Pull the knot out from inside the bar and untie it for each one. 


Then pull that vertical thicker string (from both sides) out of the rungs you'll be removing, then pull them out to the desired length. Or in my case, till all the broken rungs are removed. 


Simply slide the bottom bar back through the "rope ladder."


Slip the thicker string through the holes. 


Tie a new knot. We did slip knots just to make it easier if it ever needs to be done again.


Stuff the knot into the hole.


Push the plug back in. 


Cut the excess strings. You can either tie the "rope ladder" rungs underneath the bottom bar or just leave one "rope ladder" rung in tact. It's not noticeable either way. 


Now stand back and enjoy a set of blinds that fit your window perfectly! 

How easy was that?

Way easier than I expected, that's for sure. 

Now I just need to get some stinkin' curtains up!! 

Do you have blinds that need to be cut to size? Any suggestions for DIY curtains or cheap (but thick) curtains? 

Till next time,
Catherine

Wednesday, May 29, 2013

Virginia Renaissance Faire-Spotsylvania, Virginia


This past Memorial Day weekend we were able to be back in Richmond with our families. Among the rest of the fantastic weekend (the most perfect weather weekend ever!), we also went to the Virginia Renaissance Faire at Lake Anna Winery in Spotsylvania, Virginia! 


It was a new experience for us but it was a lot of fun! Plus free tickets don't hurt! My sister- and brother-in-law were both volunteer performers so we scored free tickets through them!


Clear blue sky! The weather was absolutely amazing and the cicadas were loud!


My lovely sister-in-law playing her part well as Margaret Emmerson. I don't know how they're all so good at staying in character! My favorite was when they called an iPhone a "pixie box."


Brian and I waiting anxiously for the mini circus show to start! 


Circus Stella was phenomenal! Dextre (pictured above) and Jana (pictured below) are a beautiful young couple who perform together. They also have 5 rescue dogs, 3 of which have a part in the show! 


It's hard to see but that's Jana up on a static trapeze. I know I wouldn't be brave enough to be up on one of those!


She is incredibly flexible and has balance like a cat!


Dextre stood on a ladder with no support! Then he had this kid climb up the ladder, again with no support, and give him his hat!


Shouldn't this be the other way around? Haha. 


Clearly the circus was my favorite part of the faire. I took way too many pictures! She also did an aerial silks routine which was amazing. 


Balancing on a chair on a tight rope!


Did I mention dogs?! Here's their newest rescue puppy named Mabel. 


Stella, the circus' namesake!


Stella jumping over Louise.


Adrian walking on poles. 


Parrot dog! She looked comfy up there!


 Dancing at the May Pole.


The minstrels playing music for the dancers. 


Shh...don't tell my husband I have evidence of him participating! He's such a good sport!


There were even alpacas!


And a falcon! Apparently there are only about 2,000 falconers left in the United States and there's a very strict hierarchy that you have to make your way up.


Jousting!! We walked over in time to see this final joust but that's all we got to see. The winner was a woman! 


The Lady's Court of Love. This was a fun interactive bit where anyone could come up and bring up a love matter than needed help solving. It could be anything from, "My friends said they would come here today at 2pm but they were late!" or "My husband won't admit I'm right!" And then the ladies of the court will banter and make a decision. It was pretty entertaining!


And here's a crummy shot of one of the vineyards. 

The faire is going on from now unti June 9th on Saturdays and Sundays. It's $9 to get in but children 5 and under are free. It's a great place to visit for fun but also is a great learning experience for kids (and adults too!). Definitely more fun than reading a textbook!

Lake Anna Winery is also a great place to visit! They're open Wednesday-Saturday 11:00am-5:00pm and Sunday 1:00pm-5:00pm. Ask for a tour and bring a group with you! 

How'd you spend your Memorial Day weekend? Have you been to a renaissance faire before? 

Till next time,
Catherine

Friday, May 24, 2013

Cook-Strawberry Freezer Jam

I've been learning lately that there are many things in our daily lives that we use or consume that we don't realize how simple it is to make it ourselves!


One of these things is strawberry jam (or any jam, really). Yes, jam! It only requires 3 ingredients and takes maybe 15 minutes to make a 6-8 cup batch that will last you months!

Why haven't I been doing this for years?!

Oh and for anyone wondering, jam is made with the FRUIT, jelly is made with the JUICE! I learned that maybe a year ago and it blew my mind. It's the little things, right?

Moving on.

Brian and I went strawberry picking this past weekend and had over 10 quarts (about 15lbs) of strawberries to eat and use!

We've been eating strawberries since we headed home from the strawberry farm! We also prepared and froze a gallon and a half of them, made smoothies and now, freezer jam!

I always thought if you made things like jam you had to can them but that's not true! This recipe is so simple and easy and after the jam sets, you can pop it into the freezer until you need it!

Ingredients:

  • Pectin (I used Sure-Jell but there are other brands that are good)
  • 4 cups of sugar (raw, unbleached, organic is best!)
  • 2 cups of mashed strawberries (over 4 cups whole)
  • 1/4 cup of water

Directions:


Gather and prepare your ingredients. Sure-Jell has a great insert in the box with directions for many kinds of jams and jellies. Sure-Jell has one packet in the box and you use the entire thing. 


Wash your strawberries. 


Hull them. 


Mash them! The fun part! I used my potato masher but I'm sure something like an immersion blender would work as well. Mash them but don't puree them because jam is best with chunks of fruit!


Mine measured at a little over 2 cups. 


 Pour your sugar into another bowl. I know, 4 cups of sugar is A LOT of sugar. I read from many sources that you can't use any more or less because the pectin won't set correctly. Sure-Jell also makes a low-sugar/no-sugar pectin as well which I plan to try soon!


Pour the strawberries into the sugar and mix well.


Mix the water and pectin together in a small saucepan. Bring to a boil for about a minute, stirring constantly. Don't let it get away from you!


When it's done boiling, pour the pectin/water mixture into the strawberry/sugar mixture and stir constantly until the sugar is well dissolved.


Now pour it into cups, bowls, jars, Pyrex or whatever you want to store it in. Be sure they have been washed thoroughly to keep any bacteria out. This is especially crucial if you are canning this recipe. Leave about an inch or more of space between the jam and the top of the jars to allow for expansion. 


I used two 2-cup size plastic containers (Ziploc brand?) and two small jars that previously had jam in them. I estimate they hold about a cup each.


Be sure to leave the lids off or just resting on top for 24 hours to let the jam set properly. 


If you're putting them in the freezer right away, leave the lids off until they're fully frozen, ESPECIALLY if you're using glass! 


Once it's fully set, spread on some toast, have a PB&J or just eat it by the spoonful! This stuff is awesome! 


Best PB&J on the block! On homemade bread, of course! 

Have you ever made your own homemade jam or jelly? What's your favorite combo of fruit? I want to try triple berry!

Till next time,
Catherine