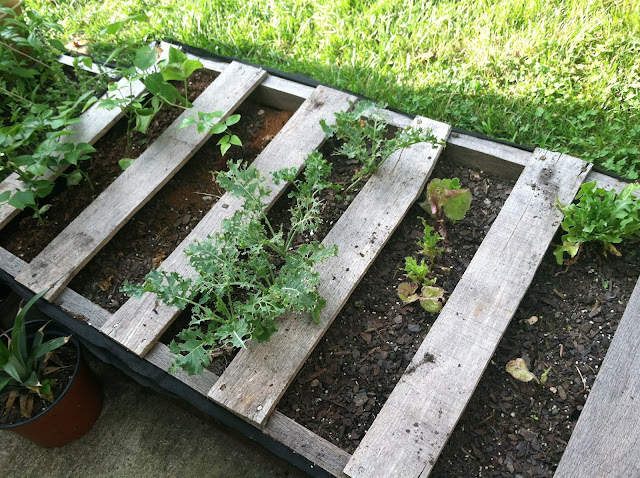
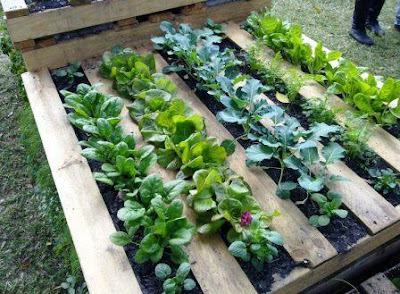
Anyone wondering why in the world I've got old pallets on my patio?? To make a pallet garden!!
(source)
That's not mine! That's the original image that I found on Pinterest ages ago. Since then I've seen it all over Facebook too. I'm sure you've seen it or a variation of it. Without even seeing tutorials, I figured it couldn't be much more difficult than stapling landscaping paper onto the bottom and sides. Sure enough I was right! Click HERE for another tutorial that I loosely followed.
 |
| I had some bug issues, overcrowding and too much rain so don't mind the scraggly-ness. |
Some of you may know from previous posts that Brian and I live in a lovely little townhouse. We really do love it and it's a wonderful place to live but it's limiting when it comes to wanting to doing more permanent things like fencing a yard for the dogs or planting a garden.
But, I've decided while I may be limited, I'm still going to grow as much as I can on our little patio! I've got the pallet garden and multiple plants and veggies growing in pots. I want to prove that even in small spaces it's possible to grow your own food! It's double challenging because my dad is the one with the green thumb in the family, not me! Although I'm passionate about growing things so hopefully that will make up for my lack of skills! We'll see!
Ok I know it doesn't look like much, but I did all seeds for the pallet garden, no transplants. I'll write update posts as the seeds sprout and grow!
What you'll need:
- Potting soil
- Landscaping paper
- Staple gun and lots of staples
- Pallet(s)
- Seeds
I got all of this at Ollie's Bargain Outlet for $15! The potting soil was only $2 a bag and the landscaping fabric (4ft x 50ft) was only $7. They had multiple lengths and sizes to choose from. The width was perfect for these pallets and I was glad to find only 50ft rather than having to spend bookoo bucks on hundreds of feet we wouldn't be needing!
My pallets I got for FREE at Lowe's! I had been wondering for months where to get pallets for cheap or free. They seem to be everywhere but not easily accessible. So I thought, anyways. I called up my nearby Lowe's store and asked if they sell or give away old pallets. At first the customer service agent said they sold them but when he asked someone else about the price, he found out they give them away for free! Now I don't know for sure if every Lowe's does this but I'd say just call and ask around.
I also read online that you should look for serial numbers stamped on them with "HT" on it which stands for "heat treated' rather than chemical treated. We couldn't find stamps anywhere on any of the pallets we got so hopefully they're the former rather than the latter.
When we drove around back to pick them up we found multiple sizes which turned out to be perfect! I thought the full sized pallets would be too big for our patio but we found two that were about half the size of a regular pallet and even one mini pallet! Jackpot!
Directions:
Flip your pallet so that whichever side you want to be the BOTTOM is facing up. I wanted neat little rows so I used the more open side as the bottom. Roll out your landscaping paper so that it meets every edge.
Now staple, staple, staple! No one's going to see the bottom so just staple away. It doesn't need to look cute.
Staples everywhere.
To make sure every side is covered, roll the landscaping paper the opposite direction of the first layer then staple away.
Fold up the corners and staple them until they're nice and secure. Brian and I actually did a total of 3 landscaping paper layers. I think as long as you do 2 you're ok. I was just worried because it seems so thin and I didn't want anything ripping.
Now it's all done and ready for soil and seeds!
Remember, it doesn't have to be pretty, just functional.
Add your soil and spread it evenly under the slats.
Get your seeds or plants ready! I chose spinach, broccoli and a mixture of 5 lettuces.
Fancy lettuce blend seeds.
Plant the seeds and water according to the directions on the seed packet. Since the soil was loose I simply dragged my trowel and made a trench about an inch deep and dropped the seeds in. The pups were out enjoying the evening too. No worries, they're attached to a yard stake so they're not going anywhere.
Oh and don't forget your super sophisticated vegetable marking system. Sigh. I'll make something nicer eventually!
 |
| The two left sections are spinach, the middle is broccoli and the two on the right are the lettuce mix. |
And there you have it! A pallet garden for less than $20! It could even be free if you have your own compost and seeds saved from years past! I'm so excited to grow our own food! I can hardly wait to post pictures when they start sprouting!
We've also got a strawberry plant and 4 roma tomato plants in pots. I bought green beans as well but still need to plant those. I'm really considering getting blueberry bushes too. Can I just have one of everything??
Yep these memes are pretty accurate about now.
Oh and I know the potting soil I got probably wasn't my best choice but it was $2...I don't know how I can refuse that. Plus, I've got another project going that will help highly fertilize my plants from now on! Can't wait to share that with you as well!
What's your favorite veggie or fruit to grow? Do you think I should get blueberry plants? Ooh or raspberry? How about both?
Till next time,
Catherine

I've linked up to Less Laundry, More Linking with Life After Laundry and Sensational Creations!


Catherine, this looks great!!! I am definitely thinking of trying this. How deep do the roots on the plants you chose go, and will they have enough room? What kinds of plants work best for this?
ReplyDeleteThank you so much! You really should! It's really cheap and easy and you get FREE FOOD all summer! From what I found online, it looks like lettuces and spinach have fairly shallow roots so they should do well in the pallet garden. The broccoli probably won't do well (it's a cold season veggie...oops!) but I think it has shallow roots as well. I would think any kind of lettuce or low plant that isn't a root veggie (like potatoes or carrots) would work great. Green onions, strawberries, kale, and basically any herbs would work well too! This website has a great chart about halfway down: http://eartheasy.com/raised-beds-soil-depth-requirements.html#b
DeleteLooks great! I'm planning to try a horizontal one like yours. I've started a vertical pallet garden with strawberries on the top two levels, lettuce and petunias on the bottow two levels. Going great so far! I also plan to make another vertical one with cucumbers and beans to keep the vines in check. :)
ReplyDeleteThank you! That's awesome! I bought more herbs and plants just today at my local Farmer's Market so I'm excited to make my mini pallet garden too! How long did it take to establish roots for a functional vertical pallet garden?
DeleteThis looks great. I will definitely be sharing this with my husband, so we can try this out for our fall garden. I love the idea of using pallets, so much easier than building something, and it isn't permanent for people like us who rent. Thank you so much for sharing this with the Less Laundry, More Linking party.
ReplyDeleteThanks for visiting! Definitely try it! There are plenty of fall crops you can start now like spinach, lettuce, sugar snap peas, broccoli and more!
DeleteHow is your pallet gardening going!? I don't see any updated pictures!
ReplyDeleteIt went OK but could have definitely been better! I have a few updated pictures but I never got around to making the update post. Oops! We've moved since and had to toss it, unfortunately.Thanks for stopping by!
DeleteHow did your garden work for you?
ReplyDeleteI don't think my soil was very good and definitely could have used some organic fertilizer. That and cabbage caterpillars kept me from being able to harvest anything, unfortunately! And we've since moved and had to toss out the pallet garden. Now we have a huge garden!
DeleteAwesome garden! How is it coming? How many and what was the spacing for the spinach and lettuces?
ReplyDeleteYou rock!
It would have worked well if it weren't for poor soil and cabbage caterpillars eating everything! We've moved and had to toss the pallet garden but this year we have a huge garden to work in! As far as the spacing, I just followed the instructions on the seed packets. That'll be your best bet :)
DeleteI was actually going to ask you if your choice of potting soil was correct. I believe it would have been better to get gardening soil and mix it with compost, but I´m looking around for better info. I guess that your project not working well is an indication that potting soil will not be my choice.
DeleteNICE IDEA .. I LOVE IT
ReplyDeleteThank you! :)
DeleteWhat was the condition of your pallet garden after the season was over? On Design Sponge, people had been freaking out that the wood on the pallets had tons of chemicals in it and that it can make people sick. Any issues with that?
ReplyDeletehttp://typearamblings.blogspot.ca/2014/05/patio-garden.html
I made a pallet garden box as well:
I used sea soil, which is what the garden centre folks had suggested and made my own fertilizer by grinding up egg shells, oven dried banana peels and oven dried mushrooms. I also made compost tea with banana peels and water left over from boiling dried shitake mushrooms. Plants seem to like it.
Our pallet garden did "ok" but not great. I'm very new to gardening so I made a lot of rookie mistakes. With better soil, timing and sun, it would have done better. We tried to look for pallets with "PT" or "HT" for pressure or heat treating, rather than ones that were chemically treated.
DeleteSounds like your pallet garden is going to thrive! I save all my eggshells for the same reason! :)
Look at how resourcefulness could save you some money. Thinking of how you can grow your own strawberries, tomato, beans and many more in your garden makes me envious of your agricultural skills. Aside from that, you get to have a beautiful and well-landscaped garden that enhances the beauty of your home!
ReplyDeleteRichard Zimmer @ Tapestry, NJ
Thank you so much for your sweet words!
Delete