Cords and cables are ugly...crochet them!
I briefly saw this idea on Pinterest ages ago but dismissed the idea because I had no idea how to crochet. In the past few months I've learned and really enjoy it! I stumbled upon the idea again and decided to try it! I'll give you a quick tutorial but if you know how to crochet, it's pretty easy! The most difficult part was getting used to handling the yarn and the cord at the same time.
To be honest, Pinterest has a crappy search feature. I couldn't find this idea on there so I just used good old-fashioned Google! I found Moogly's Blog and she had the instructions for crocheting earbud cords. My first attempt was on my iPhone cord instead of my earbuds. I'll do those next!
(I apologize ahead of time for the awful, mismatched lighting in the pictures. Bad lighting led to me switching between my phone and my crummy camera to try and get good shots! One of these days I'll get something better, scout's honor.)
To start, all you need is your cord or earbuds, some thin yarn (the thinner, the better because thick yarn can easily make it too bulky), and a small crochet hook. Mine says US F5/3.75MM. I'm not totally sure what that means, it was just the smallest hook I had! I'm using Sugar 'n Cream's tangerine cotton yarn. As you can tell, it's much prettier in my pictures than the link's picture. It's a cute color and it's soft but strong. I really like their yarn.
Start off with your standard slip knot but slip your cord through before tightening the knot. If you're new to crochet, definitely check out YouTube for great tutorials on how to do a slip knot. Check out this video I found for you. It's different than how I do it but it's just as good!
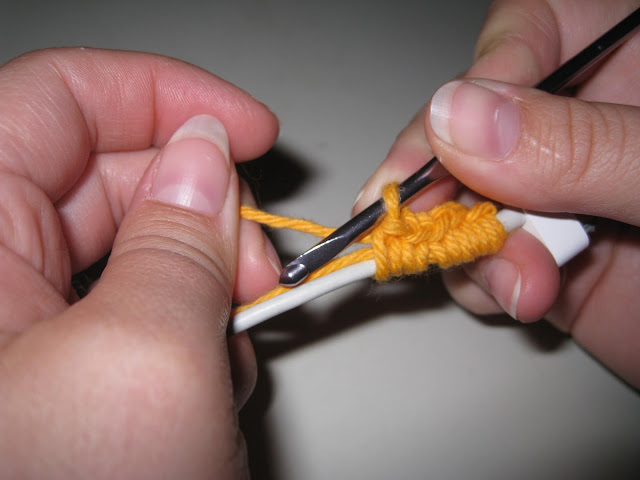
(Don't mind my stubby fingers!) Next, simply single crochet (sc) around the cord. Be sure to hold the loose yarn/tail end along the cord so that it is crocheted tightly to the cord. This saves you from having to tie and cut it. The following is step-by-step how to crochet around the cord.
Hold your working yarn out with your thumb and forefinger and the tail end being held by your other fingers.
Reach underneath the cord and pull the working yarn forward and up.
You'll have two loops on your hook. Now grab your working yarn again.
And pull it through both loops. Now keep going until you reach the end! Easy!
This is how it looks up close. Although I really like it, I wasn't totally satisfied so on the next cord (my husband's) I did a double crochet (dc) instead. I think the dc (green) is more visually interesting, but I like them both!
So who wouldn't want to make this...
...look like this?
I tried to twist the yarn to make it look more interesting...but...it didn't. So I untwisted it again.
There you have it....a cute phone cord! Easy peasy right? Give it a try and share your pictures! I've never given a crochet tutorial before so if you have any questions, let me know and I'll do my best to answer them!
Till next time,
Catherine


nice this can also be used for the hanging home theater wires form the celing
ReplyDeleteOh definitely! I plan to crochet all kinds of cords!
Delete