//Google Analytics
Showing posts with label cheap. Show all posts

Wednesday, October 30, 2013

{Wedding Wednesday} Save the Dates - Guest Post


Today for Wedding Wednesday, I'm proud to announce another guest blogger!  Chloe from How We Flourish (formerly Healthy People, Healthy Planet) is going to tell us all about save the date cards! She has some awesome tips that I couldn't agree more on! I chose not to do save the dates in order to save money, time, stress and the fact that we didn't have that many out of town guests.

Take it away, Chloe!


Save the Date

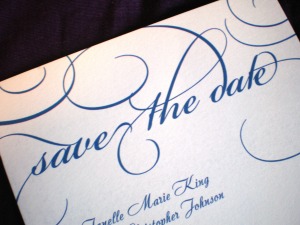
Whether you have a lot of out of town wedding guests or you just want everyone to be able to plan ahead for your wedding, save-the-dates have become another expected part of wedding planning. But do you really need to spend a dollar a piece PLUS postage for a hundred cards with your face on them? I don't think so!

Do I even need save-the-dates?

Answer: It depends. Technically, no, you don't. There is nothing in wedding etiquette law that says you must send out save-the-dates. If you are having a small or local wedding and everyone already knows your date, feel free to skip! However, depending on your guests, you may want to. Formal invitations typically go out 6-8 weeks before the wedding, so your guests may appreciate a heads up. Save-the-dates can be used not only to inform guests of the date, but also to direct them to a wedding website, where you can post travel and lodging information. This may be extremely useful for out of town guests who need to plan ahead for your wedding. An important point to keep in mind is that if you send someone a save-the-date, you have to send them an invitation. No going back. For this reason, many couples choose to only send save-the-dates to out of town guests and VIPs. Certainly only send them to people you are 100% positive you will want at your wedding. Cutting back on quantity in this way is one way to save money.

Electronic save-the-dates

Okay, so you have decided you should send save-the-dates because your family is scattered across the country, or whatever your reason may be. But maybe you still don't want to print off a hundred cards and mail them out. This is fair: it costs money and there is the environmental burden of printing and shipping to consider. Therefore, if you are not concerned about the formality your save-the-dates are conveying, feel free to let people know via the internet! A simple email may do, or you can make up a design to email out (more on designing later). Keep in mind, however, whether everyone on your list has an email address they check regularly. If your grandparents or great aunt Peggy would have trouble with an electronic save-the-date, consider giving them a call or mailing one to them.

Budget Friendly Printing

For a more formal and accessible save-the-date, you may still want to go with standard paper save-the-dates. With smart shopping and designing, these do not have to cost an arm and a leg! Go with postcards. You may think magnets or hand carved wood slices are cute, and I'm sure they are. However, not only do these products cost more, but you must also pay for envelops and postage. Furthermore, anything weighing more than an ounce or that is rigid will be charged more than standard postage. Postcards, however, are cheap and postage is only 33 cents to send within the United States (at time of posting; max size 6" x 4.25"). Even simple card stock or 80 lb glossy postcards will hold up fine in the mail. Don't buy save-the-dates. This may sound like confusing advice, but hear me out.

Buying save-the-dates from a typical invitation retailer will end up being more expensive than it ought to be. After all, if you put the word "wedding" in front of something, retailers get to jack up the price, right? So instead of shopping for save-the-dates, shop for postcards that allow you to add your own text or upload your own images. A quick search for "postcards" will yield many websites that will sell 100 custom postcards for under $20. Once you find a company you like (many will send you free samples), sign up for their mailing list to keep an eye out for sales and coupons. Don't feel limited by designs. Even if you've found a good price, you may feel stuck choosing a certain design you aren't crazy about. Luckily, many postcard sites let you upload your own picture. No design experience? No problem! Sites like PicMonkey make it easy to edit photos, add text, make collages, and then turn them into a postcard, like the one below:
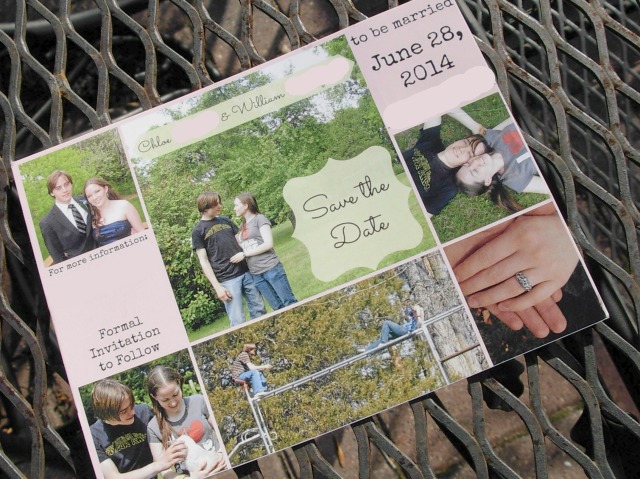
Save the Date
Me: "Why did you take the picture on the patio table?" Fiance: "It's artistic!"
Heck, if you have the creativity and time, you can even make your postcards and print them at home! Keep your eye on the prize Above all, remember that all of this planning is about you marrying the love of your life. Don't worry if your save the dates aren't absolutely perfect. Do what you can and work within your budget. There are always options if you are willing to look for them.

Enjoy your planning, thanks for reading, and a big thank you to Catherine for inviting me to post!

Chloe
How We Flourish


Thanks again to the lovely Chloe!! 

Till next time,
Catherine

If you're a fellow blogger and are interested in guest posting for this series, shoot me an e-mail at CatherinePageWood@gmail.com! Or, even if you're not a blogger and would like to share your wedding story or advice, send me an e-mail! I would LOVE to share your stories!


If you liked this post, be sure to check out the other editions of Wedding Wednesday!


Tuesday, July 30, 2013

DIY: Chalkboard Paint Labels


In the past 6-8 months I've really been trying to store things in glass jars rather than plastic that can leech chemicals into the contents. It started because I want to make healthy decisions for my husband and I but also because I couldn't handle throwing away perfectly good glass jars anymore! 
Growing up, we had a local dump that we'd take all our trash and recycling to. My dad had a great system of composting, recycling, and burning so that the amount of trash going into the dumpster was at a minimum. 

All food scraps went into the compost bin. Plastic, paper, glass, and cans went into recycling. Any kind of personal info like mail and documents went into the burn barrel. 
Then I got married and moved from home to a place that doesn't offer recycling! I think I get a little twitch in my eye every time I have to put a cardboard box into the trash can. 
But as far as glass jars go, I save almost all of them and put them to good use. Mostly I repurpose them into storage for bulk items but I also fill them with different things to give as gifts.

After a while I was getting weary of not being 100% sure what I was grabbing. You know, the whole baking powder vs. baking soda fiasco waiting to happen. Fortunately I never had any mishaps but I was waiting for it! 

Thanks to a Michael's gift card I received from a lovely and thoughtful friend for my birthday, I finally got chalkboard paint to ease my mind in the kitchen! 

Not to mention this project is super easy!

All you need is:

  • Chalkboard paint (I found my Martha Stewart brand at Michael's for about $7)
  • Foam brush
  • Chalk
  • Naked jars


Instructions:

Are you ready for how simple this is?


Shake up the bottle and squirt some paint onto a paper plate then dip your foam brush into the paint. Make sure you get an even coat on the brush. Now simply brush across the jar where you want the label to be.


As you can see, one coat doesn't cover it completely. Let it dry completely and then do another coat.


Paint the rest of your 45,356 jars.


Here you can see the difference between one coat (left) and two coats (right). 


Two coats (and sometimes three) get the job done. Let it dry for 24 hours.


Once they're dry, scratch chalk across the paint to "season" it.


Cover completely then just wipe away with a dry cloth. 


Now just write the name of the contents of the jars and you're good to go! Excuse my handwriting. It's not good to begin with but writing with chalk makes it worse!


I love seeing this in my cabinets now!


Always good to know the difference between baking powder and baking soda!


I absolutely love this project! It's so easy and inexpensive! I've heard of other ideas like painting printer labels but for an item that will be washed and reused, I thought painting right onto the jar would make more sense. And if I ever empty a jar and need to fill it with something new, it's as easy as writing on the jar!

The only downfall is that I have to be careful to not wipe off the chalk but it's really not that big of a deal. First world problems anyone? It's totally worth it to have a cute and organized kitchen!

How do you label your kitchen and your life? What have you used chalkboard paint for?

Till next time,
Catherine


I've linked up with Life After Laundry & Sensational Creations with their Less Laundry, More Linking party! Go check them out and spread some blog love! 

Tuesday, July 23, 2013

Cardboard Helmet Tutorial Update - Reader's Photos!

Some of you may remember way back in the early days of my blog (a whopping 9 months ago!) that my husband "guest posted" on my blog with a tutorial on how to make a cardboard helmet. We had no idea what a response we would get from that post. I figured it would just sit and not get any views, especially since I see the "blogisphere" to be more of a lady's domain. I was so dead wrong!

Day after day, week after week, month after month, my husband's tutorial consistently stays at the top as the most viewed post! I kid you not! As of right now it is my most viewed post at a staggering 3700 pageviews! That blows my mind! Even my pallet garden tutorial, which I thought would exceed the helmet tutorial, only has a measly 1621 pageviews.

Needless to say, I continue to bug Brian to do more cardboard craft tutorials. There is a huge demand for it apparently! Brian makes them for fun and for the movies that he makes on the side. Evidently there are plenty of others out there who want to make them too!


Several people have left comments saying that they made a helmet but one lovely reader named Deb sent me a picture of the one she made! I think it looks fantastic! Her church was doing Kingdom Rock themed VBS and she was playing a knight. 

We absolutely love reading comments from this tutorial and I was giddy like a little kid to get a photo! It is really cool to see someone else's version of something on my blog. Thanks Deb for sending us a photo! We love it!

If you've made a helmet from Brian's tutorial (or any other post be it craft, DIY or recipe), we would love to see it! We'll only post it with your permission but we think the world should see your fantastic work as well! Send any photos to CatherinePageWood@gmail.com

In the meantime, I'll be bugging Brian even more to write up another tutorial!

Have you made anything from one of the posts here at Happily Ever Crafter? What was it? How did it turn out?

Till next time,
Catherine

Wednesday, April 3, 2013

DIY: Make Your Own Make-Up!

This is the post that I have been anticipating for a while. I probably over did it. My husband and I like to call it, The Chipotle Effect. Basically when you or someone else talks something up so much and then you finally see/try/taste it and you're kind of like, "Eh." while shrugging your shoulders. Or if you enjoy it, but it's not nearly as awesome as everyone has said. Well, I did that to myself I think.

But don't let that deter you right away! I'm going to do more research and see what I can add/take away to make this even better. It's too awesome to not work!

All you need is:

  • French Green Clay (I bought mine at Whole Foods)
  • Corn Starch
  • Cocoa Powder (optional for color)


And all you do is mix the three together! The original tutorial says to do 1 part clay to 1 part corn starch. Basically, if you use 1 Tablespoon of clay, use 1 Tablespoon of corn starch as well. The cocoa powder is optional but I wouldn't recommend using an equal 1 part as well. Add it in slowly to ensure you get the color you want.

Here's how it went for me.


I started small, with a 1/2 tsp of corn starch.


Then a 1/2 tsp of French green clay.


Then about 1/16 tsp of cocoa powder. 


 And this is what it looked like. A bit too green for me.


So I added more cocoa powder. 


Better. 


And more...


Then more corn starch to lighten it. 


Even better, but not quite. 


More of each! 


This was my final color. It's not what I was expecting but it doesn't look like that color on your face. It blends into your skin very well.


As you can see, I didn't make all that much. This old spice jar works perfectly, especially if I make more! 

Tips and hints:
  • This is more of a translucent powder than a powder foundation. 
  • French green clay is used widely for facial masks and is completely natural. It's full of important minerals for our bodies and skin. 
  • Corn starch acts as an oil absorber but it won't dry out your skin.
  • Some with sensitive skin may have reactions so be cautious if you have sensitive skin. I had no issues.
  • If you want, buy all organic ingredients. I just used what I had on hand. Even all organic you can buy the ingredients for less than $10. How many make up brands are THAT cheap??
  • Because it's a powder, you'll need to apply a moisturizer first in order for the powder to stick to your skin. I recommend using Alba Organics SPF 15 Daily Moisturizer. It's light, organic and I love it! (Not paid, just love the stuff.) 
  • One awesome benefit of this is you can simply add more cocoa powder for the summer months when you're more tan then make a lighter batch for winter! So awesome! 
  • It's gluten-free!! I know this is extremely important for many people. Before this, I didn't have any clue that make up could have gluten in it!
  • Even if it doesn't turn out right, you didn't waste hardly anything but time! French green clay is great for face masks so mix your leftovers with some water for a mini spa night. Treat yo'self! 


Conclusion: 

I haven't made one yet. I really didn't see a major difference with the make up. It also seemed to wipe off way too easily. I'm not giving up yet, though because I really want this to work. How cool would it be to make all of your own make up for pennies?? I'm glad I didn't buy the 1lb jar of green clay to start with, though! I'm going to do more research and see what I can find to improve upon this. I don't want to give it up yet! 

What's your favorite kind of make up? Do you go au-natural whenever possible? What's your best make up trick? If you've used this recipe before, any tips or tricks for me? 

Till next time,
Catherine

Tuesday, April 2, 2013

Busy bee

My newest little DIY is something I've been dying to do for a while! I finally got the final material necessary over the weekend (Hint: I found it at Whole Foods) but have been working extra shifts so I haven't really had the time to actually try it out!

I'll go ahead and spoil it for you...I'm going to attempt to make my own make up out of 3 simple ingredients!!

How cool is that?!

Well, if it works, anyhow.

My mom and sister were very skeptical when I told them but I think this is totally worth a try! I am very picky about make up even though I don't wear it often. I only use powder because liquid make up feels funky to me. But of course, the only brands I'm willing to use are expensive. Therefore, I don't buy it. If this works well, I will be saving tons of money for years to come. Plus, I know exactly what's in my make up and can feel very confident about my decision being healthy, safe, non-toxic, natural, cruelty-free, gluten-free, and so on and so forth.

I'm super excited to try this out and share it with you all tomorrow!!

Any guesses to the three ingredients? 

Till next time,
Catherine

Thursday, March 21, 2013

DIY-Make Up Brush Holder

This project is as simple as it gets. It's one of those things you see all over Pinterest and think "Oh, that's so cute! I should do that to de-clutter my make up bag!" but you never get around to it. 


Buy a vase or jar...fill it with rocks, pebbles, coffee beans, sea shells, etc. 


Now stick your make up brushes, paint brushes, pencils, pens, scissors, art supplies, etc in it! 

The possibilities are endless with it too. You can use any kind of jar or vase that works with what you're putting in it and then use any kind of filler you want. Heck, you could get a large vase, fill it with dried pinto beans and stick your kitchen utensils in it! How cute would that be? Or maybe even colorful dried heirloom corn?

How about filling it with beads and sticking craft scissors in it! Or even for a child's play room, fill it with marbles and stick their markers in it! So many choices!

What combo would you do? What area of your house would it help to organize?

P.S. I may not get around to posting anything tomorrow as my husband and I will be celebrating our 1 year anniversary on a weekend trip!! So excited!!

Till next time,
Catherine

Wednesday, March 20, 2013

Pinterest Failure-Elmer's Glue As a Blackhead Remover

Ok so I'm sure most of you have seen this graphic online either on Reddit or Pinterest or somewhere else.


Well it looks like it's tried and true...it MUST work!

Not.

I was so excited when I saw that picture because I figured, here they tested it and showed picture by picture. I thought it had to be worth a try. What do I have to lose...a few minutes with glue on my nose and potentially some blackheads? Can't hurt.

Let me tell you...it doesn't work. Let me rephrase that...it didn't work for me! I'll spare you any awkward and up close nose shots but my nose didn't look different at all when I was done. I can understand the concept behind it but it definitely didn't do a thing for me.

So, Mr. Reddit Character...moral of the store is still the same, but not everything is as it appears!

What's your best blackhead removing secret? Is it an expensive product or homemade remedy?

Till next time,
Catherine

Monday, March 18, 2013

Scary Roads and Weekend Fun

I don't know how it is where you're from but here in Lynchburg it is COLD and WET! Yuck! Areas near Richmond got snow but we just got rain and ice.

On our way home from Richmond last night it began to rain a little, but nothing bad. The temperature was above freezing so we cruised as usual. All of a sudden, maybe 20 minutes from home, we saw about 6-7 sets of tail-lights going every which way on either side of the road. There was one car in front of us and they began to hit the brakes and fortunately we *carefully* followed suit. Just in the nick of time because we began to slide back and forth a bit but we were able to slow down safely without ending up like the other cars. It was a panicked 15 seconds for sure!

The odd part was that it was only that small few hundred foot section of road that was iced over but nowhere else was. I'm just so thankful we saw it in time! One car was facing down into a ditch but up on a hill on the other side so they were facing the road! No idea how they managed that but I hope everyone is OK!

Other than that we had a wonderful visit in Richmond. We got to spend time with family, including my precious niece and see some friends too. It didn't work out for me to have a girl's night like I had planned but that's ok...we'll be back soon and we can hopefully do it then!

My husband and his friends even made a bow out of PVC (for about $10) from this tutorial video I found! Man oh man did they have fun doing that! Unfortunately they didn't get pictures for a tutorial but the'll be making more and next time I'll be sure they get pictures! Maybe even a video too! So be on the lookout for that!

As for today, it's a snuggle under the covers and watch a movie kind of day! It's too cold for anything else!

How was your weekend? Are you as ready for spring as I am? 

Till next time,
Catherine

Thursday, March 7, 2013

DIY-Index Card Calender

If you're like me, you like to have an organized schedule and write down everything! Since middle school, my planner has been a place to write down homework, to-do's, and what happened that day. Sometimes it will be boring things like, "Stayed home and watched a movie," but other times it will be, "Went on a haunted hay ride with Billy, Sally, Suzie, and Tommy. Tommy was his usual crazy self and jumped off the wagon and ended up breaking his leg! The rest of the night was filled with a trip to the hospital and angry parents." Both of those are fictional stories, by the way. 

My point being, I like to write things down! I think it's fun to look back in time and see that "It was 85 degrees outside today in February and we had snow two days ago!" I just think that's really neat. I think I got this from my grandpa on my dad's side. He used to write little notes on the calendar or just stick them on the fridge. One of my favorite ones says, "Found mouse in dog food today" and then the date. It makes me smile to think of him writing these little notes and knowing I do it too. My dad has been doing it more over the years too. 

With this little project, I can look at multiple years at once which is really cool. I don't have to flip back and forth through different planners to find the right date. I originally found this on Pinterest of course. The original project can be found HERE but I just did my own version from the main picture. I adore these little farmer's market strawberry baskets and knew I saved them for a reason!

What you'll need:
  • Markers or pens in the colors you want
  • 366 lined index cards (Don't forget leap year!)
  • Scissors
  • Strawberry/fruit farm basket


Directions:

If your basket is a cardboard type one you're good to go. Mine was a clear plastic so I spray painted it this pretty green. 

Measure the width of the basket against an index card then cut them down to size so they fit properly. I cut maybe an inch or so off of mine. If you have a paper cutter this step will go quickly.

Now the time consuming part of the project is writing the month and day on each card. I tried to use a different color that sort of pertained to the month (red for February, yellow for April, green for December, etc.) but you can do it however you'd like. 

Stick the cards in the basket and toss a pen in the front. Now every day go write a quick line of what happened. 

I did this project late spring of 2012 so I grabbed my planner and filled in the cards from January 1st until the present day. January 1st was fun because it was the day we moved Brian (my husband) into our townhouse. 

Some days I forget and I have to fill in a week at a time and all too often there's nothing "exciting" to write. That's ok though because it will be fun to look back and see that on a specific day all we did was snuggle, watch movies and eat pizza. I've written other entries such as, "Tried Vinny's for dinner finally-really good!" or "Explored Peaks View Park" or "Started a blog!" or "About 4" of snow!" You can write whatever you want to remember about that day. I'm now into the second year with the index cards and I can hardly wait to look back at them 10 years from now! 

Do you like to write in a journal or planner as a memory keepsake? How do you record your life?

Till next time,
Catherine

Friday, February 22, 2013

DIY: Greeting Card Binder

OK are you prepared for this?

Gather your sweet and lovely cards from your wedding, your baby shower, past birthdays, whatever you want.

Dust off your hole puncher.

Buy binder clips from Target (about $3 for an assorted pack of 8) in the office supply section.

Now get to work. 


I don't really need to give a tutorial for this do I? 

What a "Duh!" moment on how easy this is and what a great solution for all those cards you can't toss! I did this with all the cards from my bridal shower and wedding. I also cut cardboard to fit in the front and back as covers but haven't gotten around to doing anything cute with them. Maybe I'll glue some cute scrapbooking paper over it or even Mod Podge some pretty fabric. 

Another cool aspect of this project is that you can always unclip the rings and add more cards as time goes on! 

What would you do to make it look cute and decorative?

Till next time,
Catherine


Thursday, February 21, 2013

DIY: Laundry Detergent!


Back when I first got an account on Pinterest, I pinned this recipe for making homemade laundry detergent  from Being Creative to Keep My Sanity for a fraction of the price of buying it from the store every month. I made this quite a while ago and also recently made dishwasher detergent! I love this because it's cheap, easy, lasts forever, and I actually know what's in my detergent, not just random chemicals! 

Ingredients: 
  • 1 4lb 12oz box of Borax (found in the detergent isle)
  • 1 4lb box of Arm & Hammer Baking Soda (found in the baking isle)
  • 1 3lb 7oz box of Arm & Hammer Super Washing Soda (found in the detergent isle)
  • 3 bars of Octagon soap OR 2 bars of Zote soap  OR 3 bars of Fels-Naptha soap (all found in the detergent isle)
  • 3 lb container of Oxy Clean 

You'll also need:
  • A large bucket, such as a 5 gallon one
  • Large trash bag or multiple plastic grocery bags
  • Large spoon to mix with
  • Cheese grater

All you need is 1-2 Tablespoons per load! Save your Oxy Clean scoop and measure it that way, which is what I do! It doesn't sound like much but it's all you need, trust me! 


Directions: 

Grate the bar soap in your cheese grater. I used the regular size holes. Actually, I put my husband to work for this step ;-) It will dissolve in the water, so no worries! I only wash laundry in cold water and I've never had a problem with it not dissolving. 

Now dump everything into the trash bag-lined bucket and mix! I tried to pour each ingredient in layers so it was easier to mix. 

Do I pick the easy projects or what?


My absolutely adorable jar I found at a local thrift store for about $5! I had been wanting to do this project for ages but hadn't found the right jar for it yet. I was ecstatic when I did! It's a little cracked and definitely not perfect but I think it adds to the charm!  


And here it is, all done and ready to go! I had a grocery bag FULL of extra but this was all that would fit into the jar. The little fabric bits are dryer sheets I made with flax seed and dried lavender! They smell amazing and save tons of money also. Keep reading for why I decided to make my own! 


I took this screen shot while I was watching the show My Strange Addiction about a lady who ate dryer sheets. So weird! What's worse is that the chemicals in dryer sheets have been proven to cause cancer and nervous system disorders! Why on earth would I want to put that on my clothing and linens? No thanks! Did you know that many brands of dryer sheets also contain animal fat? Heads up, vegan friends! Now you understand why I either use my own or don't use any at all! 


 Here are a couple more shots of the jar I gave as part of a bridal shower gift to a sweet friend. My husband designed the label for me...what a good graphic designer husband! I had him put the ingredients on the label so if she wanted to make more she had the recipe right there!


On the other side I listed Directions to Use and then Directions to Make. At the bottom I put a little note  saying congratulations, etc. 

What a simple gift, right? I combined this with a homemade flax seed/lavender dryer sheet and a laundry basket from her registry. I think I added more laundry related items but now for the life of me I can't remember! 

I've also given several jar-fulls to my mom and my mother-in-law and guess what...I've still got tons left! I don't remember exactly when I made it but it's getting close to the year mark I think. This stuff is great! 


Helpful hints:
  • I had a hard time finding Super Washing Soda. My local Food Lion, Target and CVS didn't have it but Kroger did. 
  • My local Food Lion didn't have Fels-Naptha soap or Zote so I bought Octagon brand. They're all basically the same. Zote can be found at Home Depot.
  • The Oxy Clean is optional but definitely can't hurt, especially if you have kids or work a messy job!
  • Remember, you only need 1-2 Tablespoons per load! This stuff will last you FOREVER! 
  • The recipe makes about 2 gallons so be prepared! 


Have you ever made your own detergent? What's your favorite detergent to use?

Don't forget to go HERE and enter my very first giveaway!! It's an amazing prize!

Till next time,
Catherine

Wednesday, February 13, 2013

DIY: Memory Keepsake Shadow Box

Ready for a super easy DIY project? 

Are you sure? It's really easy.

If you're like me, you like to save little things like movie ticket stubs, exhibit passes, concert tickets, fortune cookies and other little momentos of dates and special times with your significant other or friends. I always try to keep them in the same general place, like a giant plastic bin full of other memory items. 

So, if you've got 'em, gather 'em up.

Now buy a shadow box. The size is up to you. The one I bought is maybe a 5"x7" but don't quote me on that. 

Open up the shadow box, toss in the little treasures. Close it up. 

You're done! 

If you want to get all fancy schmancy with it you can cut a slit in the top so you can just drop in new ticket stubs as you get them. 

You can also cut a cute piece of scrapbooking paper to fit and be the background.

I didn't do either of those but I'm keeping them in consideration! 


I've always liked to save little things like that but never had a way to display them. I love this because it's so simple and it's so sweet to be reminded of these fun memories.

Do you save little things like that? What do you do with yours?

Till next time,
Catherine