//Google Analytics
Showing posts with label cheese. Show all posts

Friday, April 12, 2013

Cook: Tomato and Basil Soup


In honor of National Grilled Cheese Sandwich Day today I knew I had to make grilled cheese. Ok, well I cheat, I make "toasted cheese." Doesn't sound as good but it's definitely healthier! No frying in butter! Tastes just as good to me and less mess to clean up!

I searched Pinterest and found two recipes I liked and adapted my version from them. One was from Your Homebased Mom and the other from Food Doodles.

It looks like a lot, but I promise it's easy and you probably have most of the ingredients on hand already!


Ingredients:

  • 2 14.5oz cans of tomatoes, crushed or petit diced (I used a quart Mason jar of home-grown and home-canned tomatoes from my parents!)
  • 1/4 cup of butter or oil (I used coconut oil)
  • 1 cup of chicken broth (I used 1 chicken bouillon cube)
  • 1 can of tomato paste
  • 1/4 teaspoon of thyme
  • 1/4 teaspoon of basil
  • 1/4 teaspoon of baking soda
  • 1-2 cups of water
  • 1 cup milk (2%, whole, half & half, whatever you prefer! I used 2%)
  • Salt (to taste)
  • Pepper (to taste)


Directions:


Add all your ingredients together and mix thoroughly into a medium saucepan. The white blob is just coconut oil, don't freak out! 


Bring to a boil and then simmer for about 10-15 minutes. 


Let it sit until it's cool enough to put into your blender. You can also use a food processor or an immersion blender.


Pour it into your blender, carefully!


Blend until smooth! Anyone know why it turns orange?


This is when I added the tomato paste because I didn't think it was thick enough and the flavor wasn't where I wanted it, but obviously it's better to add it all from the beginning! 


Return to the saucepan or serve this way. At this point I added milk and water until I got the consistency that I wanted. 


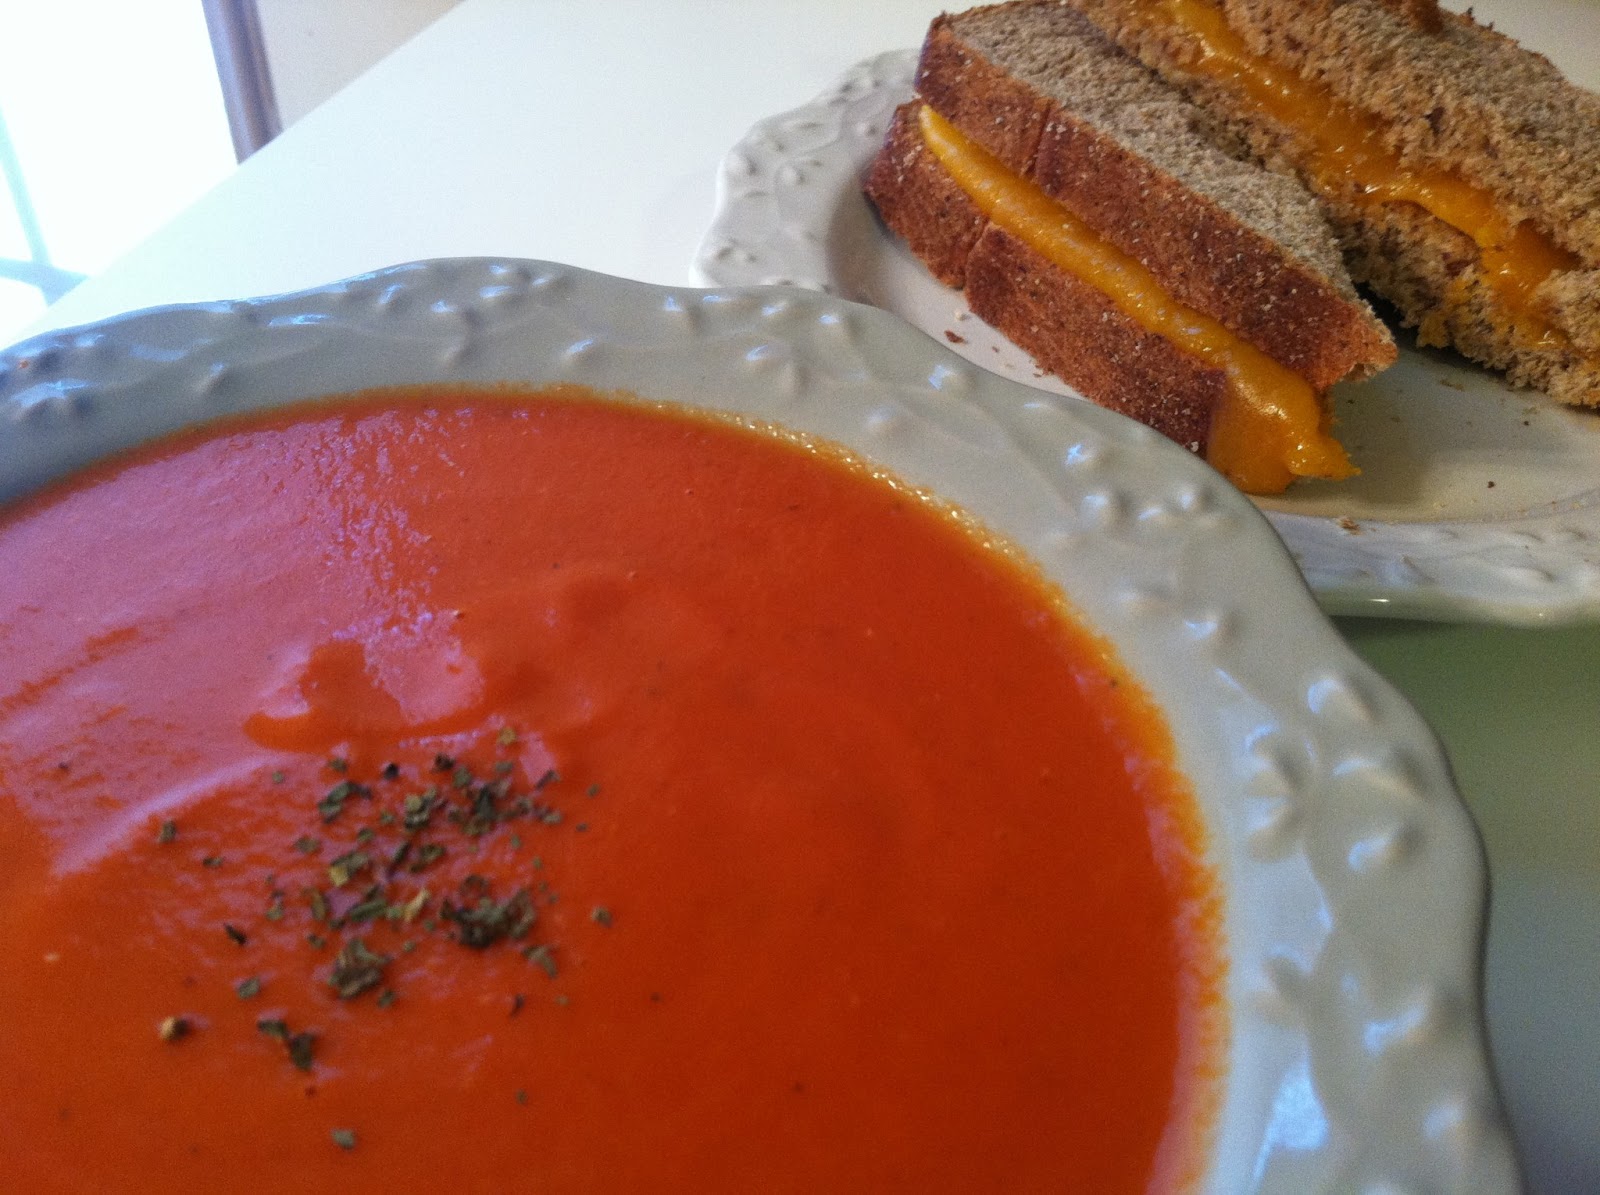
Get your grilled (er, toasted) cheese going! 


Mmm look at that melty cheese! 


Once it's the way you want it, serve it and enjoy! 


Garnish with a little fresh or dried basil for that perfect finishing touch! 


And don't forget to cut the grilled cheese at an angle like mom used to do ;) 


Or cut it into tiny bit-size pieces like me. 

Hope you go for this before buying Campbell's again! I promise, this is way better, and healthier!!

Do you prefer to make your own tomato soup or go for the can? What's your favorite way to make a grilled cheese? How did you celebrate National Grilled Cheese Sandwich Day?

Till next time,
Catherine


I've linked up to Hearthfelt Hopes #5 with The Aliso Kitchen!


I've linked up to Make Your Own Mondays 9/23 with Nourishing Treasures!


I've linked up to Mostly Homemade Mondays #47 with Frugal By Choice, Cheap by Necessity, Homegrown & Healthy, Scratch Mommy, and Mindful Mama.


Friday, February 8, 2013

Cheese Making Kit!


When I got this in the mail recently I could hardly wait to open it up!! 


It's my cheese making kit that I bought from a Living Social deal! It includes all the things you need to make tons of different cheeses! I have always wanted to try my hand at making cheese and now the possibilities are endless. I'm way too excited about this! 

The cheese making kit was sent by Standing Stone Farms out in  Tennessee. They raise Nubian goats for their milk and are famous for their immense knowledge of all things cheese. 

There are so many cheese recipes that I'm having a hard time deciding where to start! 

Any suggestions? What's a good cheese to make for a first-timer like me?

Till next time,
Catherine


Monday, January 7, 2013

Cook: Whole Wheat Spinach & Feta Pizza

My husband and I have an unhealthy obsession with Domino's Spinach and Feta pizza. I know! I know! But sometimes, it's just a guilty pleasure when we don't feel like cooking. While grocery shopping, Brian got the grand idea to buy the ingredients to try and make it ourselves! We had talked about it before and now we finally got around to it and let me just tell you...best decision. 


Just take a look at that! It tastes as good as it looks, I swear it!

Even if you're not a big fan of spinach, trust me, you'll like this! 

Whole Wheat Spinach & Feta Pizza

Pizza Dough Ingredients:
  • 1 1/3 cups of warm water
  • 1/3 cup of sugar
  • 1 Tbs or 1 packet of active dry yeast
  • 6 cups of whole wheat flour
  • 1/4 cup of extra virgin olive oil
  • 2 tsp salt

Toppings: 
  • Drizzle of extra virgin olive oil
  • Sprinkle of garlic salt
  • Grated parmesan cheese
  • Grated romano cheese (optional)
  • Block of shredded mozzarella
  • Fresh spinach leaves
  • Crumbled feta cheese 

Preheat your oven to 400 degrees. Prepare your pizza dough first. Basically you proof the yeast by letting the warm water, yeast, and sugar sit for about 10 minutes, then slowly mix in the flour (add in the salt and olive oil with the first cup of flour). Knead the dough once it is thick enough to be handled, adding flour as needed. Form it into a ball and let it "rest" for about 15 minutes. 


Now roll out the dough. We split the dough into two and they made a somewhat thin crust pizza but we got two instead of just one. I recommend splitting it into two because whole wheat pizza dough tends to be pretty filling, in my opinion. 


Press your fingers into the edges to create a crust on the outside. I made just a little crust so it would keep the sauce from spilling over but not so much that you end up wasting it. 


Carefully move the dough to your pizza pan. I brushed olive oil over the surface so that the garlic salt would stick. This step may or may not be needed. 


Sprinkle some garlic salt on the edges for a little delicious addition. 


Now sprinkle your parmesan all over. In hindsight, it's probably a better idea to put the parmesan on after the alfredo sauce because it made it a little more difficult to spread the sauce. 


Pour on the alfredo! 


Spread it to whatever thickness you prefer. We used maybe 1/3 of a jar. 


Mozzarella time! As thick or thin as you want! We like a bit of cheese as you can tell!


Fresh spinach leaves on top. It looks like a lot but they shrink up a bit in the oven. I think next time I'll put almost double this much. 


Sprinkle on your crumbled feta. We also put a little more mozzarella on top of the spinach leaves to help bake them onto the pizza.


Now bake the pizza for about 15-20 minutes. Keep an eye on it though. 


Once the cheese starts to brown it's done!


Sometimes it can be tough to see when whole wheat is done because it's more difficult to see when it's browning. Relying on the cheese turning brown seemed to do the trick for our pizzas.


I used to be a plain cheese pizza kind of girl but after trying the spinach and feta pizza from Domino's, I was hooked! And now that we've mastered it at home, we're both totally hooked. I doubt we'll be calling Domino's anytime soon! The best part is that, despite all the cheese, it's at least whole wheat dough and there's spinach on it! 

We'll be making this again for sure! I think you should too!

Do you like to make your own pizza? What's your favorite kind of pizza to make or buy?

Till next time,
Catherine


I've linked up to Less Laundry, More Linking #5 with Life After Laundry and Sensational Creations!


Monday, November 12, 2012

Cook: Lasagna Spinach Rolls

Today, I'm thankful for honesty. I love when people are able to get over themselves and just be honest. Honest in the little things, honest in the big things. More honesty in this country would make this country a better place. But today, I'm thankful for those who are being honest already and make it a point in their daily lives to be an honest, genuine person.


Looks delicious, right? It is! It's like your own personal roll of lasagna heaven. I pinned this recipe on Pinterest a while back and am SO glad I finally made it! I used that recipe as a guideline but added my own taste to it. My recipe also makes double what the original recipe makes. So, be prepared to put half in the freezer or feed a large family! Or, just half the recipe!

Ingredients: 
  • 1 box of lasagna noodles (20 in the box, used 19 because 1 broke)
  • 1 10oz frozen package of spinach, thawed and drained
  • 15oz container of ricotta cheese
  • 16oz container of cottage cheese
  • 1/2 cup parmesan cheese (more or less to taste)
  • 1/2 cup shredded mozzarella (more or less to taste)
  • 2 eggs
  • Salt
  • Pepper
  • Jar of tomato pasta sauce
  • Jar of alfredo sauce
Directions:

Boil your noodles ahead of time then strain them and lay them out so they cool off. You should probably use wax paper, but I didn't have any, so I used aluminum foil. It worked fine. Also, preheat the oven to 350.


Put your spinach, ricotta cheese, cottage cheese, parmesan, eggs, and a dash of salt and pepper into a medium bowl.


Mix tit together well. Mostly be sure your eggs and spinach are mixed in. I used a wooden spoon that I guess might be considered a spork and that helped separate the spinach.


Spoon out maybe 1/4-1/3 cup of the mixture onto your noodles and spread it evenly. I didn't measure which gave me a little trouble later...whoops!


Roll 'em up!


Before placing them in your pan, pour your pasta sauce in the bottom and spread it around. As you can see, using the whole box of lasagna makes a lot! Once you've done that, place your rolls in the pan...or panS in my case. 


Then, take your alfredo sauce and spoon it over the tops of the rolls. If you don't like alfredo, you don't have to do this. I thought the combination was delicious!


Then, take your shredded mozzarella and sprinkle it on top! It's looking real good now, huh? You could also add more parmesan on top if you wanted. Or do parmesan instead of the mozzarella. All of these choices would be delicious!


Now, pop them into the oven at 350 for about 40-45 minutes. If you did as many as I did where they're all touching, you'll need closer to 45 minutes. If you did less with them not touching, check them after about 30 minutes. If they're getting crispy and a little browned, they're good to go. 


Mouth watering deliciousness! I baked the large dish first and put the small one into the freezer for another time. 


Mmm mm mm! Enjoy!

A couple recommendations:
  • If you plan to make a lot and freeze half, buy some of those metal pans at the grocery store. 
  • If you want them to be crispier, lay them in the pan so that they are not touching each other. 
  • Don't put too much in each roll! I started with putting too much in the first 6 but ended up barely having enough for the last few!
  • Save your extra sauce for those who like their lasagna extra saucy!
What's your favorite lasagna recipe? Do you like to keep it simple or go all out?

Till next time,
Catherine


I've linked up to Make Your Own Mondays 9/9/13 with Nourishing Treasures!

Tuesday, October 9, 2012

Cook: Tuna/Chicken Salad Like No Other!

Tuna salad...such a simple recipe. It's good just about any time, any place. And if you're not feeling tuna or don't have any, you can always switch and use chicken. This recipe is fantastic for both. I developed this myself over time just picking ingredients that I thought would be tasty! I found out last night that it's one of my husband's favorite things that I made! Who knew! Together 7 years (married only 6 months) and we're STILL learning new things about one another!

Keep in mind...I don't generally cook with exact measurements. Unless it's necessary. Usually the first time I make a recipe, I'll go by exact measurements but after that I just throw things in. I learned this from my mom and it's just the way I cook now! That being said, there are no exact measurements in this recipe. You can totally customize it with whatever specifics you want!

Ingredients:
  • Can of tuna (or chicken)
  • Your favorite mayo - to taste
  • Colby Jack cheese or Cheddar cheese, about two slices
  • Craisins
  • Flax seeds
  • Dill weed
  • Fennel seed or tarragon (tarragon is better with chicken but they both cut the fishy taste)
  • Walnuts

Directions:

Drain the chicken or tuna. I'm a nut and don't like hardly any water in there so I even mush paper towels into the can to get all the excess! I like the moisture to be from the mayo. But be sure to give the juice to whatever begging pet is at your feet!


Add in the mayo to taste. I'm using Kraft Mayo with olive oil to try and be a little healthier. I like the way it tastes too! I would estimate I used a tablespoon and a half. Never measured it though. My advice is to add in a spoonful, mix, and taste test, add more as needed, till you have it the way you like it.


Note: I don't add salt because I feel like there is plenty in the chicken itself. Feel free to add salt and pepper to taste!

Cut about two slices off your cheese block. I'm using colby jack today but cheddar can be just as delicious! It just depends what you're feeling!

Shhh, don't tell anyone I wasn't using a cutting board! I like to cut the cheese (hardy-har-har) into small cubes, but you can shred it if you prefer.


Then add about a handful or so of craisins. This is my favorite part! I love craisins!! Add a small handful of walnuts, crushed to whatever size you prefer. Then toss in some flax seeds (ground or whole), dill weed, and fennel seed (or tarragon).


Yummmm

Mix to perfectection and enjoy!! I love this mix so much that I usually eat it by itself with no toast or bread. Now that I've been making my own honey wheat bread, it goes perfectly with it and I might not be able to resist tonight!


Just check out how delicious it looks on homemade honey wheat bread or a delicious wheat wrap! Add a handful of lettuce or spinach leaves and make it a fuller meal! I swear I could eat it all the time! And it's really healthy!


Bon appetit! 

Tonight we're combining the chicken salad with a lovely veggie soup! Delicious!

Do you have your own famous tuna salad or chicken salad recipes?  What are some of your favorite simple recipes?

Till next time,
Catherine


I've linked up to Wellness Wednesday (August-Week 3) with Intoxicated on LifeNourishing Treasures, Raising the Barrs and Finding The Source!