//Google Analytics
Showing posts with label oven. Show all posts

Monday, January 21, 2013

Cook: Maple Mustard Chicken


Ok, I know that's not the most appetizing title but trust me when I say this stuff was good! The original recipe can be found here

Ingredients: 
  • 4-6 boneless, skinless chicken breasts or strips
  • 1/4-1/2 cup sweet and spicy mustard
  • 1/4-1/2 cup maple syrup
  • Salt and pepper
  • Olive oil
  • Parsley and/or chives for garnish

Directions:


Preheat your oven to 400 degrees. Mix together the mustard and maple syrup. Don't skimp and use crappy syrup. Get REAL maple syrup...you know...the kind from a tree! Mrs. Butterworth and Aunt Jemima aren't cuttin' it anymore. Not in this household anyways! I used 1/4 cup of each but I think next time I'll do 1/2 cup of each so there's more sauce. Just do it however you think it'll taste best! If you like mustard, add more mustard!

This is how I made the recipe, but I think it would be even better if the chicken was marinated overnight in this sauce. That's how I plan to make it next time. 


Lay your chicken out in an oven safe dish.


Drizzle your EVOO on top.


Salt and pepper those bad boys!


Pour on the maple mustard dressing. 


Sprinkle some parsley and/or chives (I did both because I already had them mixed) for some pretty garnish. Just do it, it's not like they taste bad! Or like anything for that matter.


Bake for about 30 minutes. The downside to this is that the sugars in the maple syrup burn and make a horrible black crust on the dish. Another note for next time, either use a disposable baking pan or line your dish with aluminum foil! It's nothing a good soak in the sink won't cure, but still, if you're like me, you hate dishes and especially ones that require more work!


Add a little salad on the side and some fresh pineapple and there you have it! My husband LOVES pineapple so I bought one at the store the other day and knew he'd love to see it cut up and ready to eat.


A very delicious dish that will be sure to please your family! My husband couldn't get enough of it! 

Are you a fan of mustard? What kind do you like to stick with? This recipe would be great with just about any type of mustard! 

Till next time,
Catherine


Thursday, November 29, 2012

Cook: Crispy Sweet Potato Fries


Mmmm....sweet potato fries have been a favorite of mine for several years now! They're heavenly and delicious and I've heard they're healthier than regular fries. Don't quote me on that, I haven't fully done my research yet! 

Nevertheless...they are delicious.

But they are the devil to make!

I have made sweet potato fries so many times and, although they usually still taste good, the consistency is never right! They're either burnt or soggy. Ugh. Am I the only one who's been dealing with this? 

Well one day on fabulous Pinterest, I came across this blog The Art of Doing Stuff with an eye catching post title, Guaranteed Crunchy Sweet Potato Fries. I stopped dead and immediately put "sweet potatoes" on my grocery list. 

Give this a try and let me know how it turns out!

Ingredients: 
  • 2-3 medium sized sweet potatoes
  • A few tablespoons of arrowroot powder or corn starch
  • A few tablespoons of olive oil (or you choice of oil. I try to stick with EVOO as it's usually the healthier choice)

Directions:

Wash the sweet potatoes. Also preheat your oven to 425.

Now cut them into medium size fries. Not too thick like steak fries but not shoestring either. Peeling them is up to you. I chose not to in order to save time and the skin doesn't bother me. 

Fill up a pot with cold water and soak your fries anywhere from an hour to all day. This step helps remove the starch which will make them more crispy later. You can even drain and refill the pot a couple times if you'd like. 


Next, drain the pot of water and toss the fries in a bag with a few tablespoons of corn starch. Shake the bag until the fries are evenly coated.


They don't need to be covered so thick that they're all white, but a light coating will do just fine. 


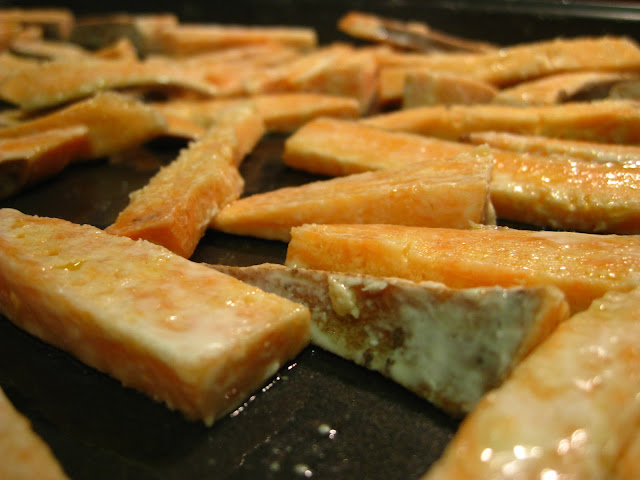
Spread them onto a cookie sheet.


Now drizzle your oil on the fries. Get in there with your hands and make sure there's a nice even distribution of oil on all the fries. Start with a couple tablespoons and add more as you need it. Generally, the more oil, the crispier the fries. This is also the time to sprinkle salt or any other spices you want to add. I prefer not to add salt because I eat the fries with ketchup and there's plenty of saltiness in ketchup.


Be sure to spread the fries evenly on the cookie sheet so they're not really touching. Bake them for 15 minutes. Don't forget to flip them about halfway through! Check them at 15 minutes. If they're still not quite ready, flip them again and pop 'em back in the oven for another 5 minutes or so.


When they're done, they should look as mouth watering as this!

I had a tough time with the fries sticking to the cookie sheet but I think it was just that I didn't flip them soon enough. Making the perfect sweet potato fries is definitely an art form because it is so time consuming and tricky to get it just right! The results are so worth it! If it doesn't work just right, keep trying! It takes time to get them the way you like them. I've just accepted it's not the easiest food to make and never will be unless you buy the prepackaged kind from the store! 

If you enjoy your sweet potato fries with ketchup, check out my blog on making homemade ketchup that is delicious and much healthier than store-bought. It's easy to make too!

Do you prefer sweet potato fries or good ol' French fries? What's your method to making them just right? Deep-fry or bake?

Till next time,
Catherine

Be sure to check out the awesome blogs where I've linked up this post! Spread the blog love! 


I've linked up to Make Your Own Mondays 9/16/13 with Nourishing Treasures!


I've linked up to Mostly Homemade Mondays Week 46 with Frugal By Choice, Cheap By Necessity, Homegrown and Healthy, Scratch Mommy, and Mindful Mama!


I've linked up with Plucky's Second Thought Link Up #12 with Plucky's Second Thought!


I've linked up to the In and Out of the Kitchen Link Party #34 with Feeding Big!