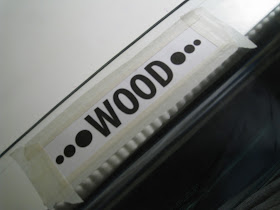
First of all, I have got to say that this is my new favorite thing! I want to etch every piece of glassware that we own!
This is another project that I had been dying to try and finally got around to it! The reason it kept getting postponed was that the Armour Etch isn't exactly cheap. We fortunately found a little kit that only cost about $18 at Michael's. It was over $20 for the individual bottle but they were sold out and the next size up was almost $40 and it was way more than we needed. I think the kit was a good value because it gives you better detailed instructions and tips as well as a paint brush, stencils, and a craft stick. It also came with a small square piece of glass to practice on.
(via)
Here is my inspiration from, you guessed it, Pinterest. Maybe one of these days I'll be clever enough to make up my own crafts! But doesn't that look awesome? I knew I wanted to etch my last name into a couple dishes, especially our casserole dish so that if I were to ever bring it somewhere, there'd be no question as to which one is ours!
Let's get going :)
What you'll need:
- Glassware
- Contact paper or masking tape and your printed design
- Xacto Knife
- Armour Etch
- Junk paint brush
- Preferably rubber gloves
Directions:
Gather your materials. First, if you're using my method, place a layer of masking tape onto the area you want to etch. Sorry there's no picture for this step.
Now tape down your design on top.
CAREFULLY cut out the design. You may need to press fairly hard to cut through the layer of paper and tape. Take your time for the best results! The circles were pretty challenging but it got easier as I kept going.
Peel off both layers. Be sure to leave the masking tape layer for the inside of letters like "O," "A," "R," etc.
By the magic of the internet, that was fast!
Pull off the paper layer and inspect your work. Use the Xacto knife to fix any mistakes.
Now get your handy dandy little kit!
This is a small bottle but I don't think it's necessary to buy anything bigger unless you plan on etching a LOT of glass!
Shake the bottle vigorously to mix up the cream. Apply a thick amount onto your stencil. When it's done, you can carefully scrape it back into the bottle if you used a lot.
Now let it sit for about 5-10 minutes. It really works in a minute but I left it for longer to ensure a good result.
Carefully wash off the cream and wash and dry as normal. Voila!
I also etched our name into our glass pie dish.
But it didn't stop there! I even did the only fancy glasses we own!
So if you look close you can see it's not perfect but really, who's looking that close? I'm super happy with the way they turned out! I love, love, love every piece!!
A couple hints:
- The instructions that came with the kit said that Armour Etch may not work with Pyrex products but it worked fine on ours!
- Be super careful! This stuff can be very dangerous. Wear rubber gloves or just make sure to not get any on your skin. If you do, be sure to wash it immediately!
- We only found one roll of contact paper at the craft store and it was a massive amount. I knew we would never use that much so we opted for masking tape and paper. It worked fine, though!
- If you plan to make bigger designs, then I would suggest following the original tutorial here.
- Only etch the OUTSIDE of glassware that food/lips won't touch!
Have you ever used Armour Etch before? I think doing this to any type of glassware with a couple's last name or initial would be an adorable wedding or housewarming gift...don't you? I'll be keeping my eye out at Goodwill and thrift stores for some great glassware to work with!
Till next time,
Catherine
I've linked up to Pinworthy Projects #77 with Just Us Four, My Favorite Finds, and Atkison Drive!


That came out really well Catherine! I've been wanting to try that!
ReplyDeleteThanks! I am thrilled with it...you should definitely try it!
DeleteEtched Glass is a nice kind of gift most specially if there's candy, cookies or chocolate inside of it.
ReplyDeleteDefinitely!
DeleteSuch a brilliant and skillful glass etching. Love to try that for my mug and glass plates. Thanks.
ReplyDeleteThank you! :)
DeleteThanks for commenting and stopping by! :)
ReplyDeleteI enjoyed reading yourr post
ReplyDelete