//Google Analytics

Monday, February 4, 2013

Saying Goodbye to Jonny

Today is the day of Jonny's funeral. My husband and I unfortunately aren't able to attend because we live too far. Our thoughts and prayers are with his family through this difficult time. 


This is Jonny during the games and recreation period of Studentz Camp in the summer of 2012. He was doing his best "model pose" for the one taking the photo. Jonny's father is the director of the camp, which are the same camps my husband and I have been working at for quite a few years. Jonny was always a joy to hang out with and be around during camp, and also the conference in the winter, YEC.

I remember hanging out with Jonny and some other girls in the camp office during the weekend just before camp and we were all just goofing off while setting things up. He had an iPad and kept catching embarrassing videos of us! We couldn't help but laugh, though.

In the months leading up to Jonny's passing, my husband's company, IFR, made a video of his story. You can view that video here.

Anyone who knew Jonny can be comforted by knowing he is pain-free and in Heaven right now...but at the same time, we can't help but mourn that he was taken from this world so soon. We know we'll also see him again one day.

Please continue to keep the Maltempi family in your prayers.

Till next time,
Catherine

Friday, February 1, 2013

Heavy Heart

Today my heart is heavy for a lovely family I have known for over 5 years now. The Maltempis are the sweetest, most loving, and hilarious family. Their youngest son, Jonny, went to be with the Lord this morning. He had been battling brain tumors for over 6 years. He was only 16 years old. He ran the race and fought the good fight but it is still hard to believe he's no longer with us. I know his family and friends are taking comfort in the fact that we will all walk with him again one day in Heaven.

Please join me in praying for the Maltempi family.

Till next time,
Catherine

Thursday, January 31, 2013

Printerpix

About a month after our wedding in March of 2012, I found an awesome Groupon deal for this photo album website called Printerpix. The deal was for an 8"x8" leather bound 20 page photo book for only $9! It's normally $50! We decided to get two so each of our sets of parents would get one.

Enter stage right: Procrastination.

After hours and hours of looking through my wedding photos to choose which ones would go online and more hours captioning and tagging them, I honestly didn't feel like looking through them for a while! It sounds weird, I know but I was tired of it. I love looking through my wedding photos and relieving the moments but man, there's a point where you just have to take a break.

So here we are, January 31st, about 10 months after we bought the deal and today is the last day before it expires. Ahh! Needless to say, I'm going as fast as I can!

With that being said, I'm done here!

Do you procrastinate? What kind of cool Groupon or LivingSocial deals have you scored?

Till next time,
Catherine

Wednesday, January 30, 2013

DIY: Glass Etching


First of all, I have got to say that this is my new favorite thing! I want to etch every piece of glassware that we own! 

This is another project that I had been dying to try and finally got around to it! The reason it kept getting postponed was that the Armour Etch isn't exactly cheap. We fortunately found a little kit that only cost about $18 at Michael's. It was over $20 for the individual bottle but they were sold out and the next size up was almost $40 and it was way more than we needed. I think the kit was a good value because it gives you better detailed instructions and tips as well as a paint brush, stencils, and a craft stick. It also came with a small square piece of glass to practice on.  

(via)

Here is my inspiration from, you guessed it, Pinterest. Maybe one of these days I'll be clever enough to make up my own crafts! But doesn't that look awesome? I knew I wanted to etch my last name into a couple dishes, especially our casserole dish so that if I were to ever bring it somewhere, there'd be no question as to which one is ours! 

Let's get going :)

What you'll need:
  • Glassware 
  • Contact paper or masking tape and your printed design
  • Xacto Knife
  • Armour Etch
  • Junk paint brush
  • Preferably rubber gloves

Directions:


Gather your materials. First, if you're using my method, place a layer of masking tape onto the area you want to etch. Sorry there's no picture for this step. 


Now tape down your design on top. 


CAREFULLY cut out the design. You may need to press fairly hard to cut through the layer of paper and tape. Take your time for the best results! The circles were pretty challenging but it got easier as I kept going. 


Peel off both layers. Be sure to leave the masking tape layer for the inside of letters like "O," "A," "R," etc. 


By the magic of the internet, that was fast! 


Pull off the paper layer and inspect your work. Use the Xacto knife to fix any mistakes. 


Now get your handy dandy little kit! 


This is a small bottle but I don't think it's necessary to buy anything bigger unless you plan on etching a LOT of glass! 


Shake the bottle vigorously to mix up the cream. Apply a thick amount onto your stencil. When it's done, you can carefully scrape it back into the bottle if you used a lot. 


Now let it sit for about 5-10 minutes. It really works in a minute but I left it for longer to ensure a good result. 


Carefully wash off the cream and wash and dry as normal. Voila!


 How cool is that! I know it's hard to tell in the pictures but it looks awesome!


I also etched our name into our glass pie dish. 


But it didn't stop there! I even did the only fancy glasses we own! 


So if you look close you can see it's not perfect but really, who's looking that close? I'm super happy with the way they turned out! I love, love, love every piece!!

A couple hints:
  • The instructions that came with the kit said that Armour Etch may not work with Pyrex products but it worked fine on ours! 
  • Be super careful! This stuff can be very dangerous. Wear rubber gloves or just make sure to not get any on your skin. If you do, be sure to wash it immediately!
  • We only found one roll of contact paper at the craft store and it was a massive amount. I knew we would never use that much so we opted for masking tape and paper. It worked fine, though! 
  • If you plan to make bigger designs, then I would suggest following the original tutorial here
  • Only etch the OUTSIDE of glassware that food/lips won't touch!

Have you ever used Armour Etch before? I think doing this to any type of glassware with a couple's last name or initial would be an adorable wedding or housewarming gift...don't you? I'll be keeping my eye out at Goodwill and thrift stores for some great glassware to work with!

Till next time,
Catherine


I've linked up to Pinworthy Projects #77 with Just Us Four, My Favorite Finds, and Atkison Drive!


Tuesday, January 29, 2013

Maya Angelou and New Friends!

The wonderful and wise Maya Angelou spoke tonight at Randolph College in Lynchburg. I'd love to tell you how great she was, but unfortunately I didn't get in!

I met up with a new friend from a book club I just joined and we had a delicious light dinner at Rivermont Pizza before getting in a tremendously long line just before 6pm. Dr. Angelou was scheduled to speak at 7pm. We knew we should arrive early because students and teachers were allowed in first but there were no tickets, just first-come, first-served basis. What we didn't realize was that all of Lynchburg decided to show up!

After waiting for over two hours and meeting up two other ladies from the book club, some police officers came and told everyone that the building was full and we had to leave. Such a bummer! We got as far as her tour bus, but no further. Despite not being able to see Maya Angelou speak, we had a great time hanging out and chatting with other folks in line. It ended up being really fun!

We left Randolph's campus and walked a couple blocks over to Mangia to sit and chat some more with drinks and appetizers. They had the most adorable old man playing classic and ragtime piano the whole evening! One more lady from the book club came by and joined us and shared some things that Ms. Angelou said. She was lucky enough to know a Randolph alumni and was able to get in!

Overall we had a great night, had a little preview book discussion, ate good food, swapped stories and came up with great ideas like a cooking club expanded from the book club.

Did I mention I ran out into the street to try and help catch a loose dog?

Yeah that happened too.

It was a great night and we made some great memories! Can't wait for our first book club meeting on Saturday! We're reading MWF Seeks BFF-My Yearlong Search for a New Best Friend. It's really good!

P.S. This was my 100th post!!!

Have you ever read any of Maya Angelou's work? What's your favorite poem or book?

Till next time,
Catherine

Monday, January 28, 2013

Cleaning Clogged Drains with Vinegar and Baking Soda

I don't know about you, but the fewer chemicals I have in my house, the better. If I can use a natural cleaner over something harsh like bleach, ammonia, or other conventional cleaners, I will. I had heard that vinegar is great on just about anything to clean. You can read one of my first posts where I cleaned mold off of a door with vinegar here and here! The second link has visuals. In addition to being a great mold killer, vinegar, especially paired with baking soda, works wonders. 

I first heard about using vinegar and baking soda to clean pipes/drains on Pinterest. Of course. One of these days I'll come up with something original! Ha. The link to the original pin site is here

So if you're like me, your hair seems to constantly clog the drain in the tub/shower. And if you're not fortunate enough to have a garbage disposal, eventually crumbs and bits of food cause a gross buildup in your kitchen sink. You might be ready to reach for the Drano but wait! There's an easier way! 

I have no idea how much Drano costs, but I'm fairly certain that white vinegar and baking soda is cheaper. And, much safer. 

So read on if you want to effectively, cheaply, and safely clean that nasty, backed up drain! 


All you need is:
  • Distilled white vinegar
  • Baking soda
  • Boiling water
  • Lemon juice (Optional: I used it to shine the sink) 

And in no time you'll have a sparkling sink and no more standing water! 


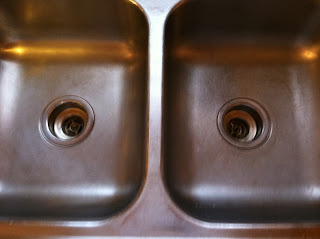
 Ok it may be hard to tell because of the quality of the picture but the left side has been cleaned and the right side is still nasty.


Dump a lot of baking soda into your drain. Fill it up if you want! It's fun to watch the reaction.


Then pour in your vinegar. No precise measurement, just pour until it foams nicely.


 Bubble bubble toil and trouble! That pesky junk in the drain shall be no more!


Let the baking soda/vinegar reaction sit for a minute, up to 15 if you want, then pour in a kettle full of boiling water. This will help flush everything down.

I was so excited to see how fast the water drained after I did this! I'll definitely be doing it on all of our drains, especially the tub! Gross. 

I quickly got motivated to give the sink a good scrub down. I sprinkled baking soda all around the sink then scrubbed with a regular sponge. The mild abrasiveness cleaned it really well. I then poured lemon juice on the sponge and wiped down the sink for a lovely shine. 


It may not seem like much, but it's a big difference, I swear! It's not the nicest sink, but it's what we've got! And that was probably the best it's looked since it was installed. The joys of renting. 

What are some of your favorite cleaning methods? Do you like to go all out with the strongest grade stuff available or do you like to use the not-so-harsh natural versions?

Till next time,
Catherine

Saturday, January 26, 2013

YEC East

No time to write...so late! We had a great first day of YEC despite 2-3" of snow here in Virginia Beach!


YEC was wonderful. I love waking up to a beautiful beach sunrise every year.

Till next time,
Catherine