(via)
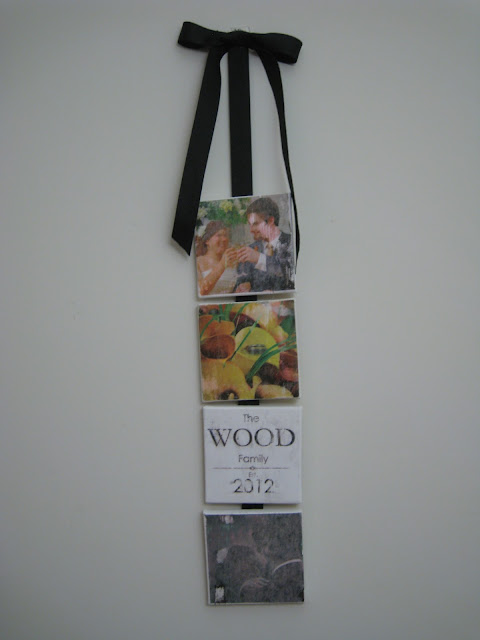
I had been eyeing this project on Pinterest for quite some time! It's so cute! The owner(s) of the website actually sell these kits to do it yourself and also give tips on how to make it yourself without the kit. They actually just trim pictures to fit and glue them onto the canvas. I had been dying to try photo transfer onto canvas for a while too so I decided to combine these two projects into one! I followed this tutorial for the photo transfer. She uses wood blocks but it works for both wood and canvas.
I think it turned out pretty well!
What you'll need:
- Mod Podge
- Gel Medium (I used matte but glossy works too!)
- Ribbon of your choice
- 4 small 4"x4" stretched canvases
- 3 4"x4" pictures
- Backwards graphic "The Wood family est. 2012" -OR- a Cricut vinyl decal
- Foam brush or a paint brush
- Hot glue gun
Directions:
First, brush a somewhat thick layer of gel medium onto the surface of a canvas.
Now press your picture onto the canvas and carefully smooth out any wrinkles or bubbles.
NOTE: Using this method will result in a backwards picture when you're done! Keep this in mind. That's also why I specified backwards wording unless you're fortunate enough to own a Cri-Cut!
Repeat this step with all of the canvases and leave them to dry for several hours or overnight. I let mine dry overnight to be on the safe side.
Take a wet rag and wet the surface of the paper.
Gently rub off the paper with your hands.
It won't be perfect so don't freak out! I was a bit disappointed because some of the ink was rubbing off too but it actually looks really cool on this artsy shot of my bouquet and our rings.
Repeat this step for each canvas.
Let the surface dry a little and then brush on a layer of Mod Podge to protect and coat the picture.
Repeat this step for each canvas.
Now let them dry completely. It shouldn't take but an hour or so at most.
This picture is a good example of how this project might be interpreted as a Pinterest fail. See how my poor husband's face has been rubbed off?
Now that your canvases are dry, cut a length of ribbon about 6" longer than your canvases lined up.
Hot glue, or whichever type of glue you prefer, the ribbon to the back of each canvas on the top and bottom for extra security. Leave the extra 6" or so hanging out of the top of the project.
I spaced mine maybe a 1/2 centimeter apart from each other. You can also see on the bottom picture where the ink rubbed off and it's almost hard to tell what the picture is of! It's us during our first dance :) Also you can tel it smudged the words as well but my husband said he really liked the way it looked!
Now make a pretty bow and glue it to the top tail of the ribbon.
I also cut a tiny piece of ribbon and glued it on either side on the back of the bow to act as a hook.
I used a simple Command Hook to hang this. The little fabric "hook" I made on the back of the bow fits perfect!
And up she goes! What do you think? Ok so it's not perfect but my husband likes the way it turned out and I'm warming up to it more and more! I think I would've preferred a more clean-cut version but this is cool too.
A little something for the bottom of the stairs! Finally! We've got way too many bare walls!
All-in-all, a fun little project that didn't cost too much or take too long!
What do you think? Would you prefer a clean-cut version or the more artsy version?
Till next time,
Catherine


Looks cute! It turned out really well! :)
ReplyDeleteThank you!!
DeleteThis is really an interesting project to do. Nice idea you shared here.
ReplyDeleteCanvas Photos
Thanks!
Delete